Efficient table creation in Illustrator
Tables are tedious to make in Illustrator, but there’s a quicker way. This post shows how to create an accurate table efficiently using Illustrator’s built-in tools.
— views


Tables in general are something I naturally avoid doing in design applications, they’re frustrating to make. They are easily to overlook due to this and that they can be quite uncommon in use. Let’s say you wanted to design a table in Illustrator, and you wanted a quick and accurate way to do so. This post will show you how.
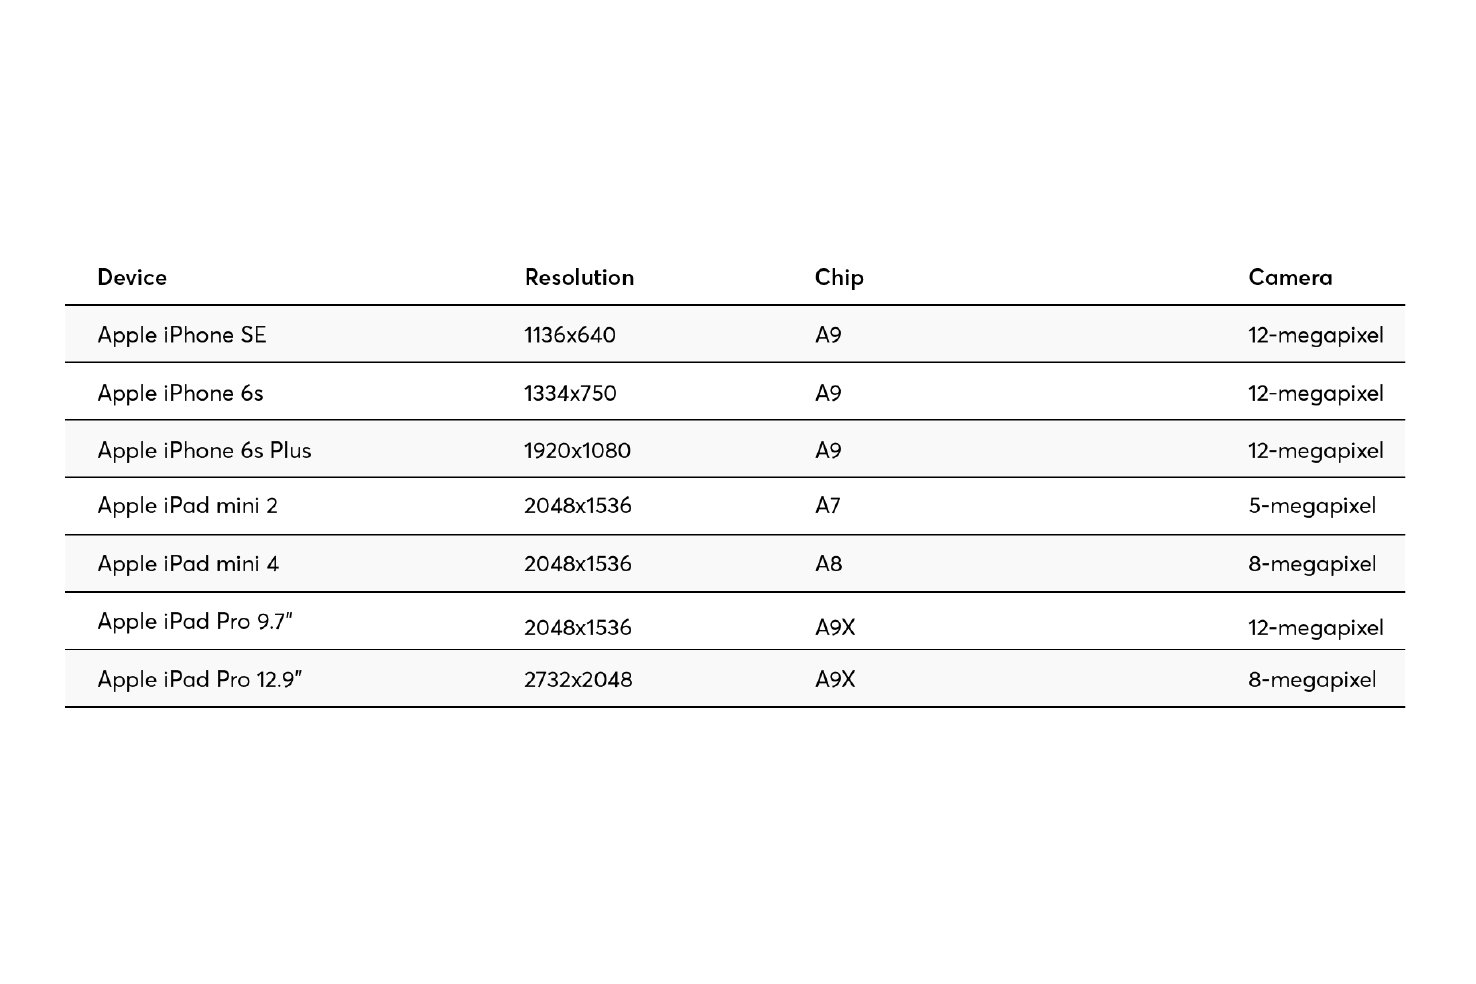
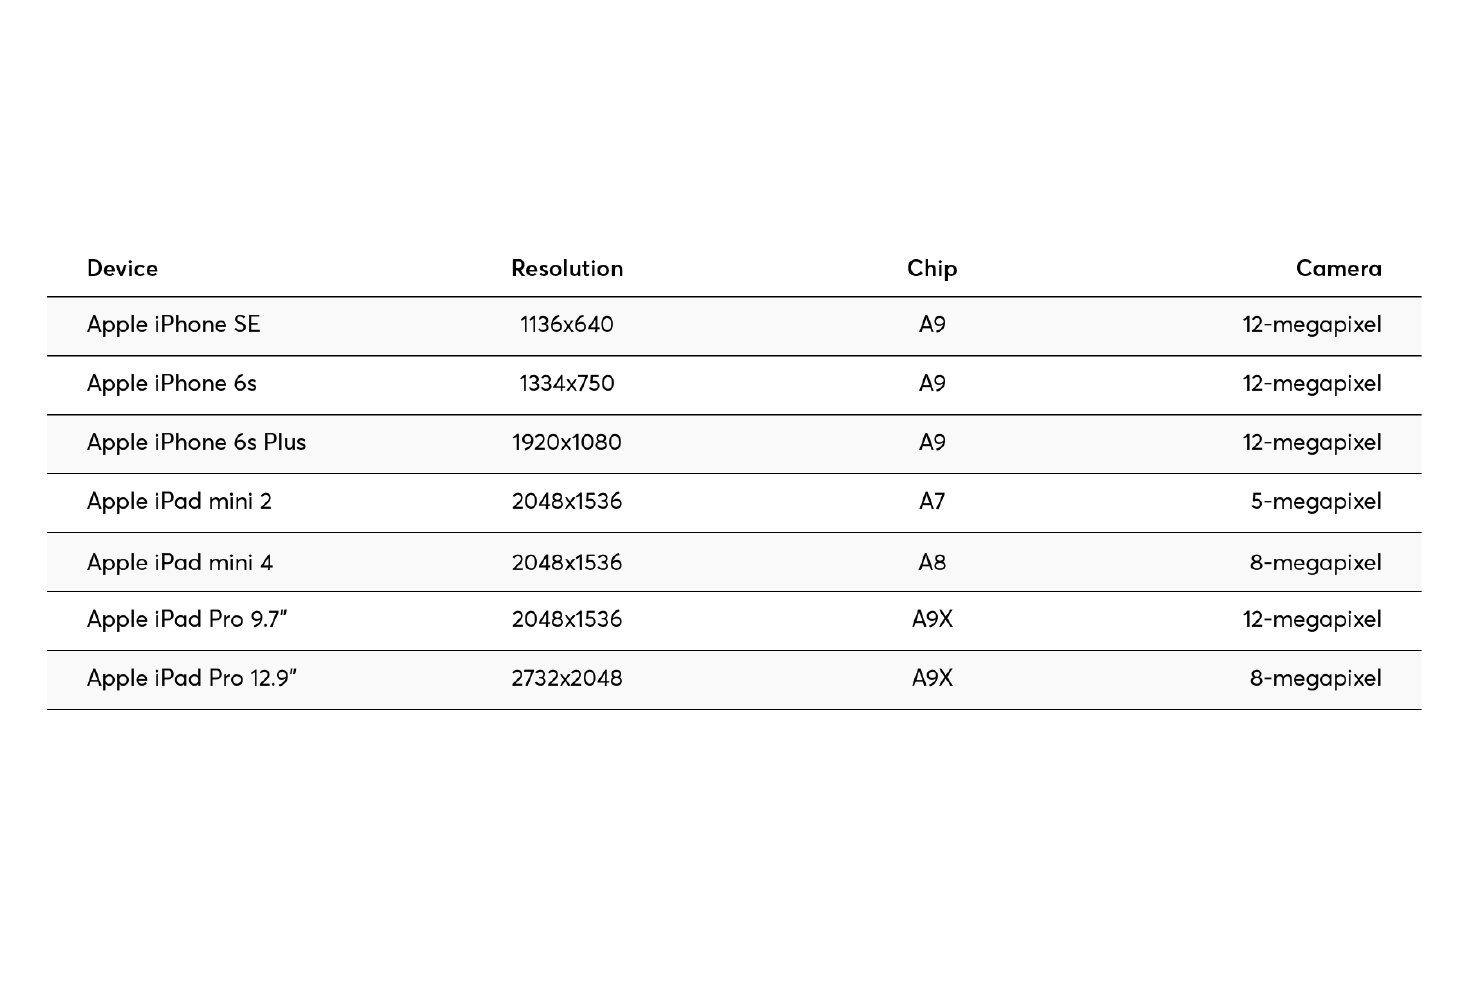
What we will end up with
At the end of the post you’ll end up with something that looks like this, if you would like to skip ahead you can download the file.
Make a new document
The first step is to setup a new document, the size isn’t too important, but I’ve made an 1200⨉800 web artboard.
Getting the initial row layout
The first step is to get the necessary elements in place to begin to build up the table. Select the line tool using \.
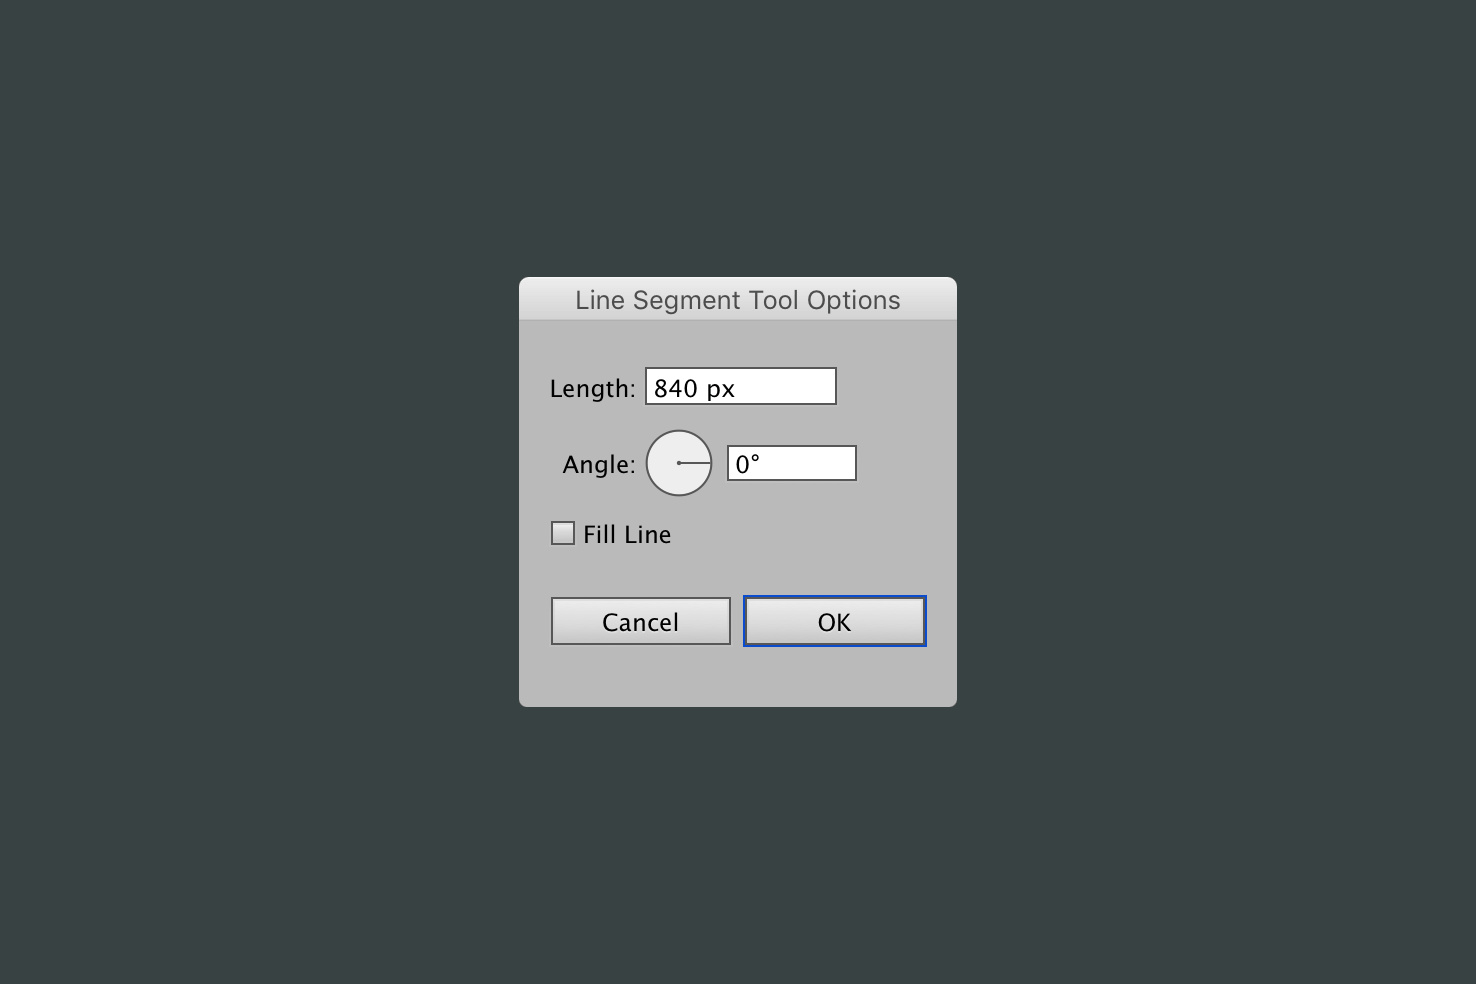
Then click the artboard and you’ll be presented with a window. The length should be 840px and the angle should be 0°.
Duplicate the line
The next step is to duplicate the line and paste in place. Copy the line with cmd + c then paste in place with cmd + shift + v.
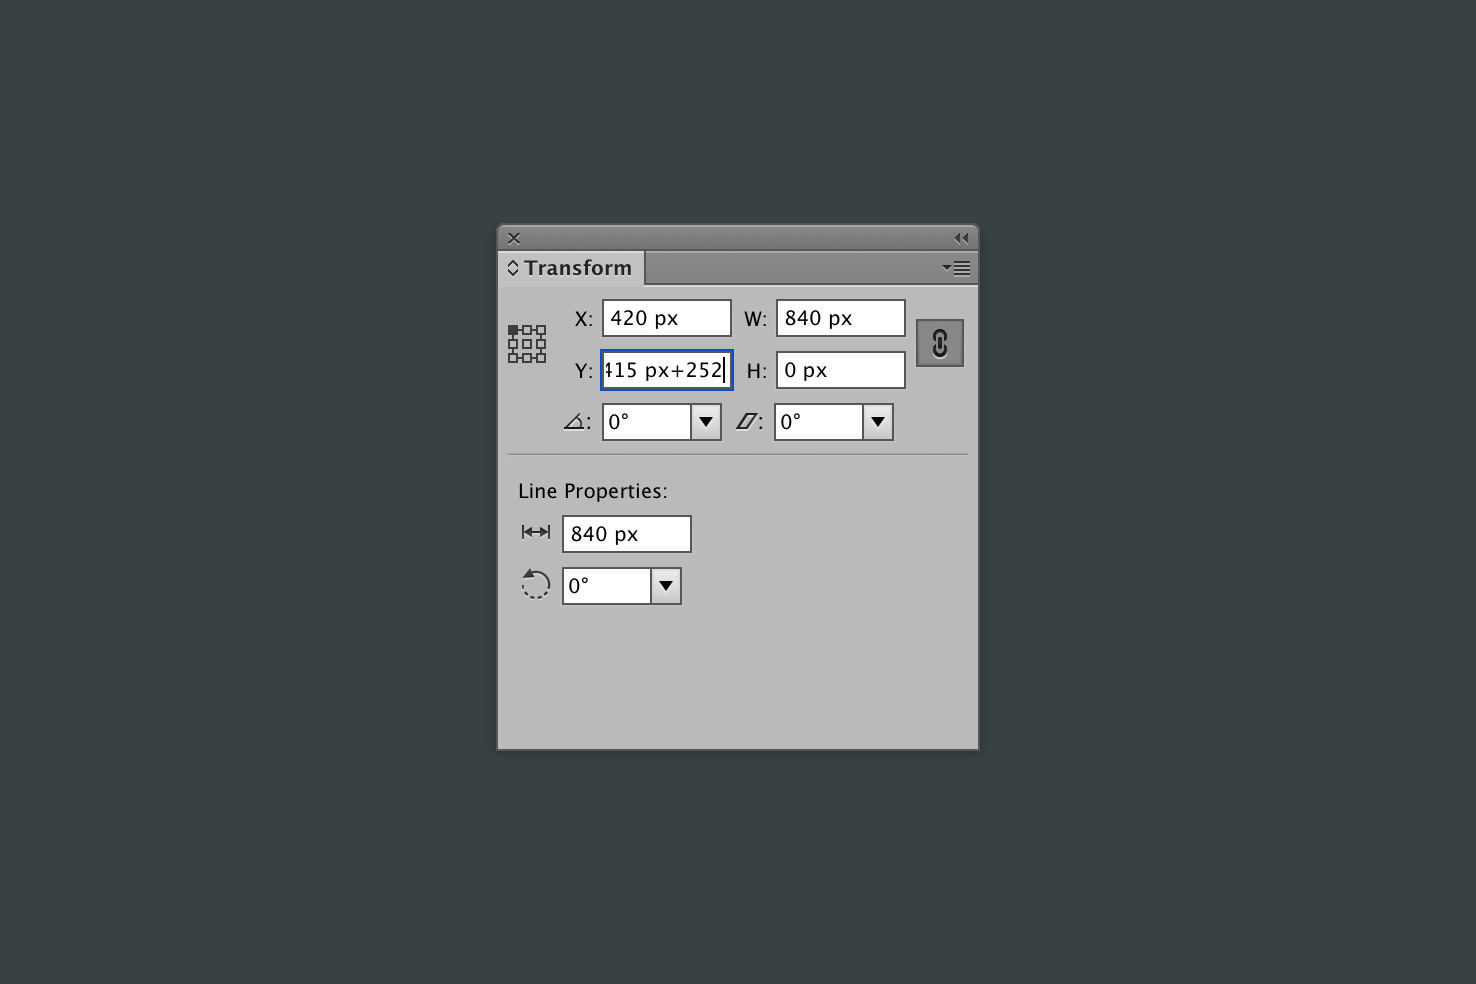
With the line still selected, open Window > Transform. Click to the end of the y coordinate and type ‘+256’ this will add 8 rows worth of space at 32px each to the y coordinate.
Using the blend tool to make additional lines
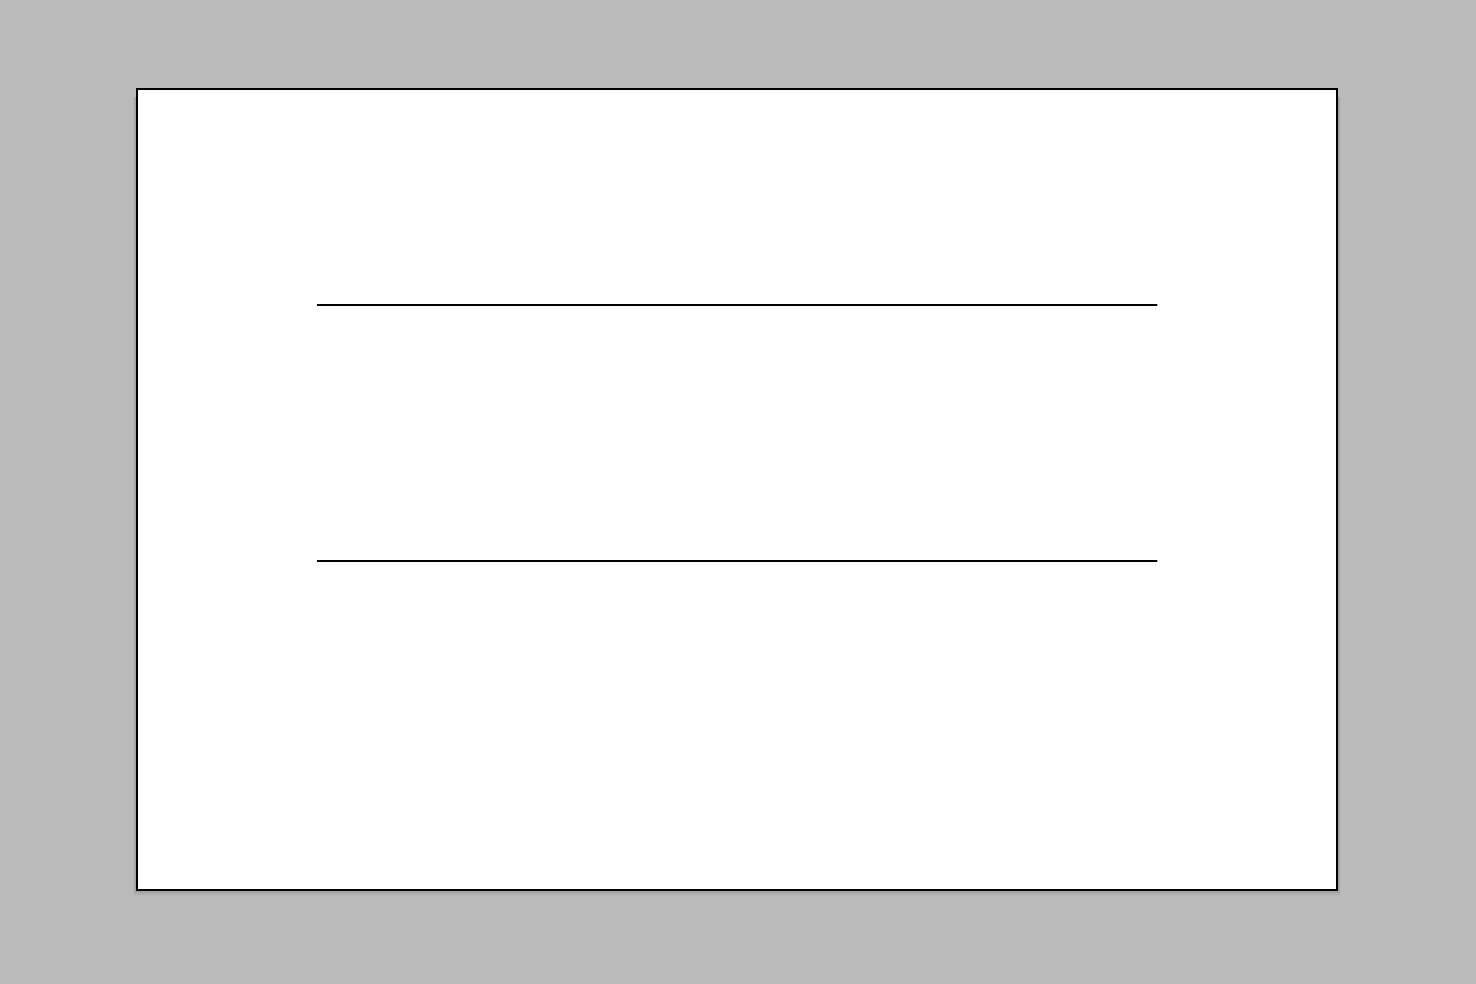
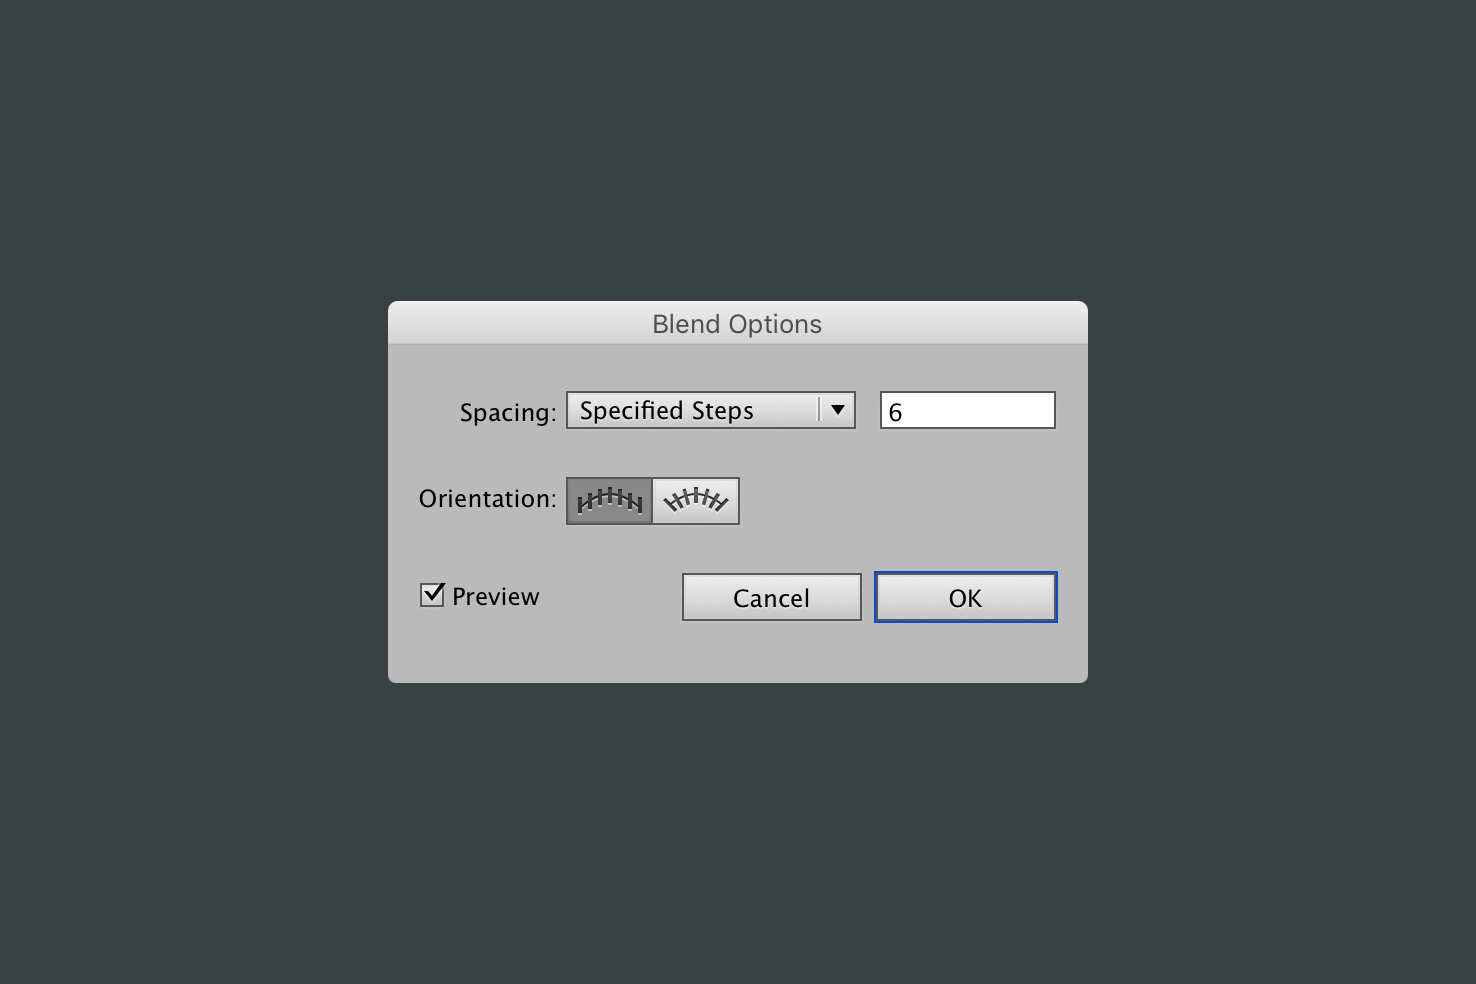
Select both of your lines, then press cmd + alt + b, or in the menu go to Object > Blend > Make. After doing this you may have what appears to be a filled box.
Next, in the menu go to Object > Blend > Blend Options. This is where you can customise the blend. In spacing select ‘Specified Steps’ and put in 6. Click ‘OK’ and you have the cells.
Alternating row colour
Now you’re going to use split into grid to make rows to use for the background colour.
Add a rectangle
Press m, click the artboard and add the values 840px by 252px. So that the rows will be covered.
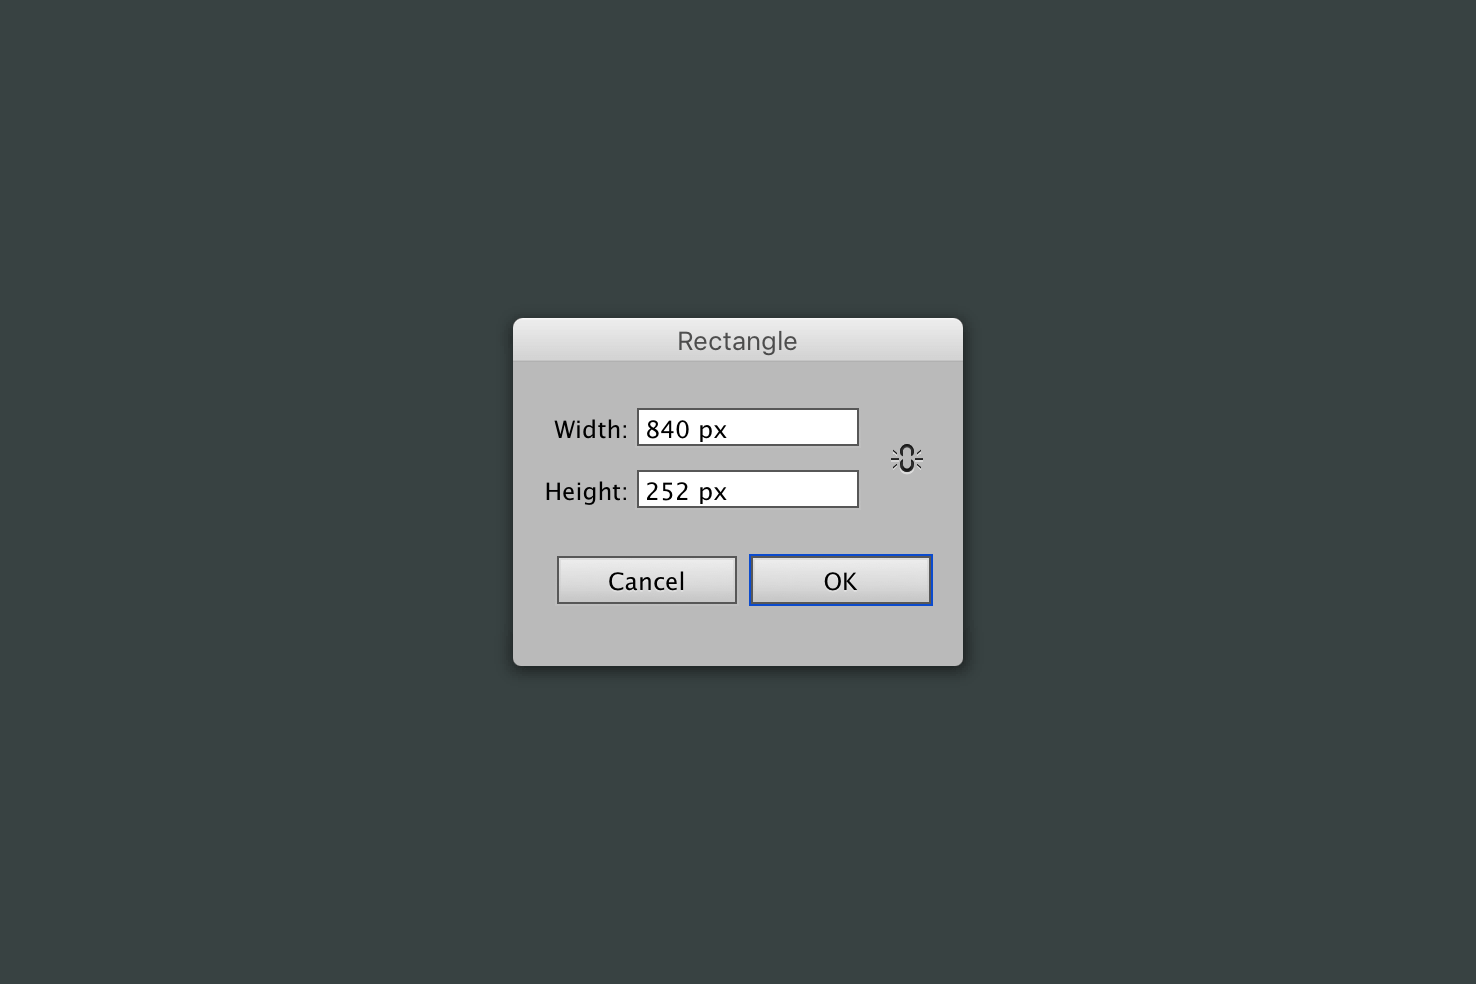
Next, fill the rectangle with any colour, purely for visibility.
Align the rectangle
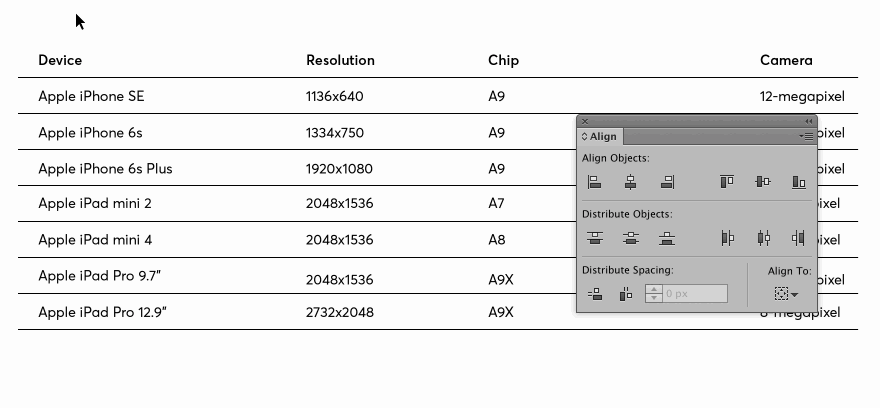
Select both the rectangle and the lines that have been blended. Then open the align panel, which can be found under Window > Align.
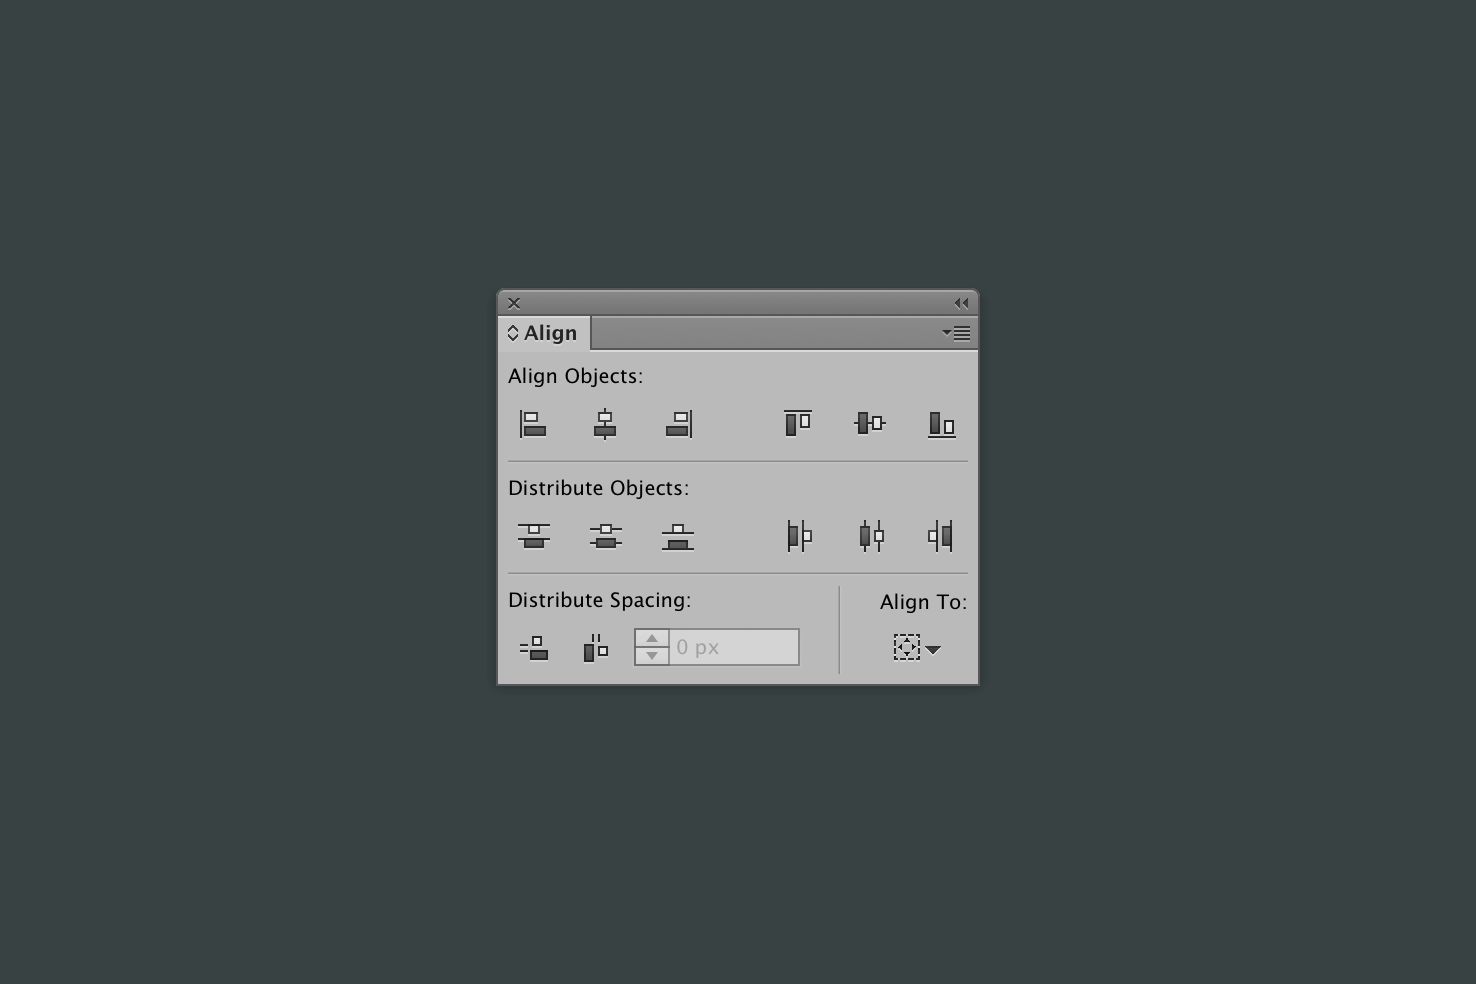
Now using ‘Align to Artboard’ click both horizontal and vertical align centre.
Make the rows

Next is to select your rectangle then go to Object > Path > Split into Grid.
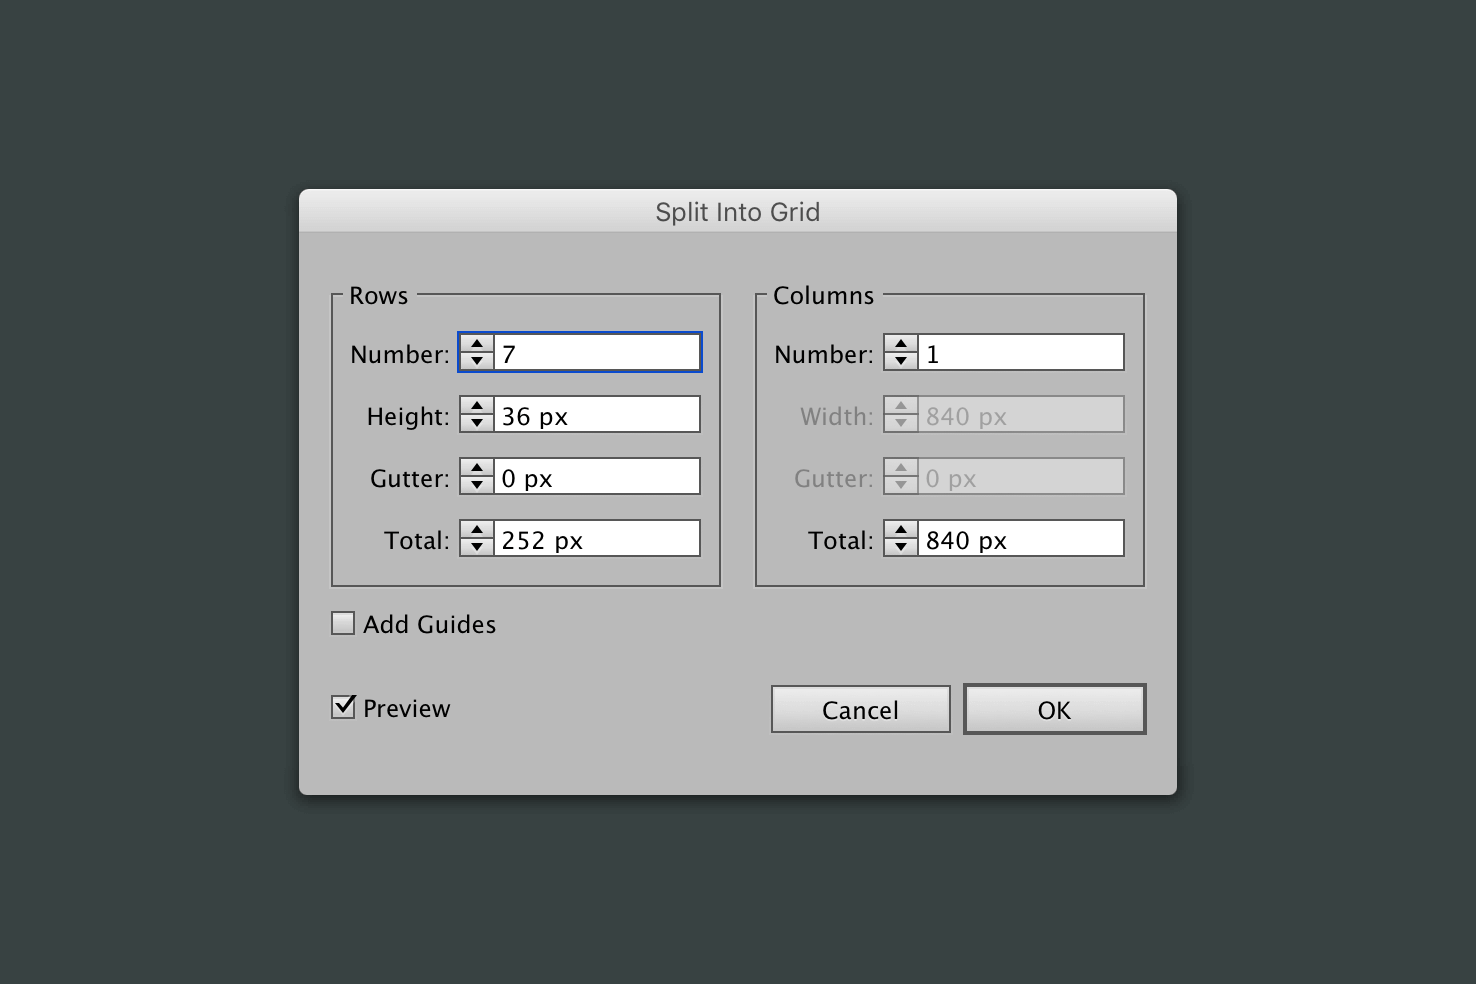
Add 7 to the row count and click ok. The rectangle will be the top most layer, so press cmd + [ until the rectangle is behind the lines.
Alternating row colour
I would recommend that you don’t delete rows to get the alternating row colour. This will make alignment trickier later for each row. Instead, fill them with the main background colour.
Expand
If you want to apply different stroke widths to change the style, it will be ideal to expand the blend. To do this you can press cmd + e, or by going to Object > Expand in the menu.
Add some content
At this stage now is ideal to add content, that way you can determine column length. Then add the vertical lines, if this is your preference. I would recommend a manual approach as column width isn’t easy to determine.
Once you have your content entered, you can think better about alignment. Everything is likely to be placed pretty well, but some things will be off.
Row alignment
Using align to key object you can align each row reasonably quickly.
Using align to key object is important because it makes sure nothing nudges out of place by a few pixels.
Column alignment
As mentioned a little earlier I recommend aligning these manually. Changing text alignment where you see fit and that should be it.
Define your style
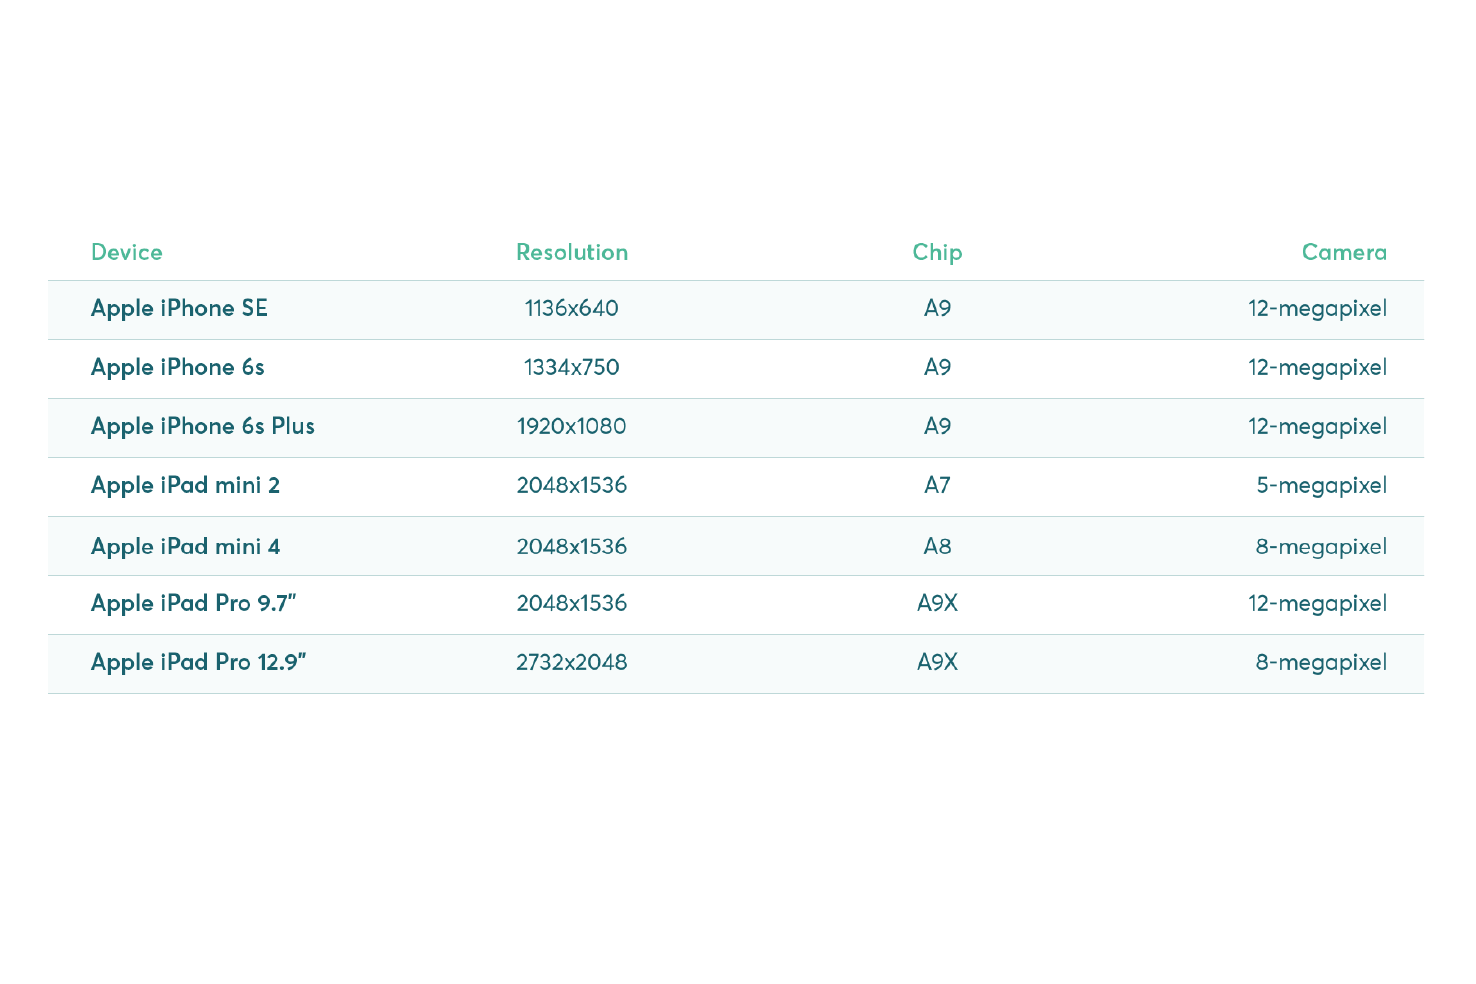
That’s it, I’ve defined some simple styling, to keep the tutorial short, but you can very much build up on this. The techniques learnt within this post can really help tasks like this much more efficient.
View on Github