Shop filter series: visual style completion
In the last post the basis for the visual style was set. In this post it will continue with that to complete the filters. There are some challenging areas like colour selection, as it can look overwhelming.
— views
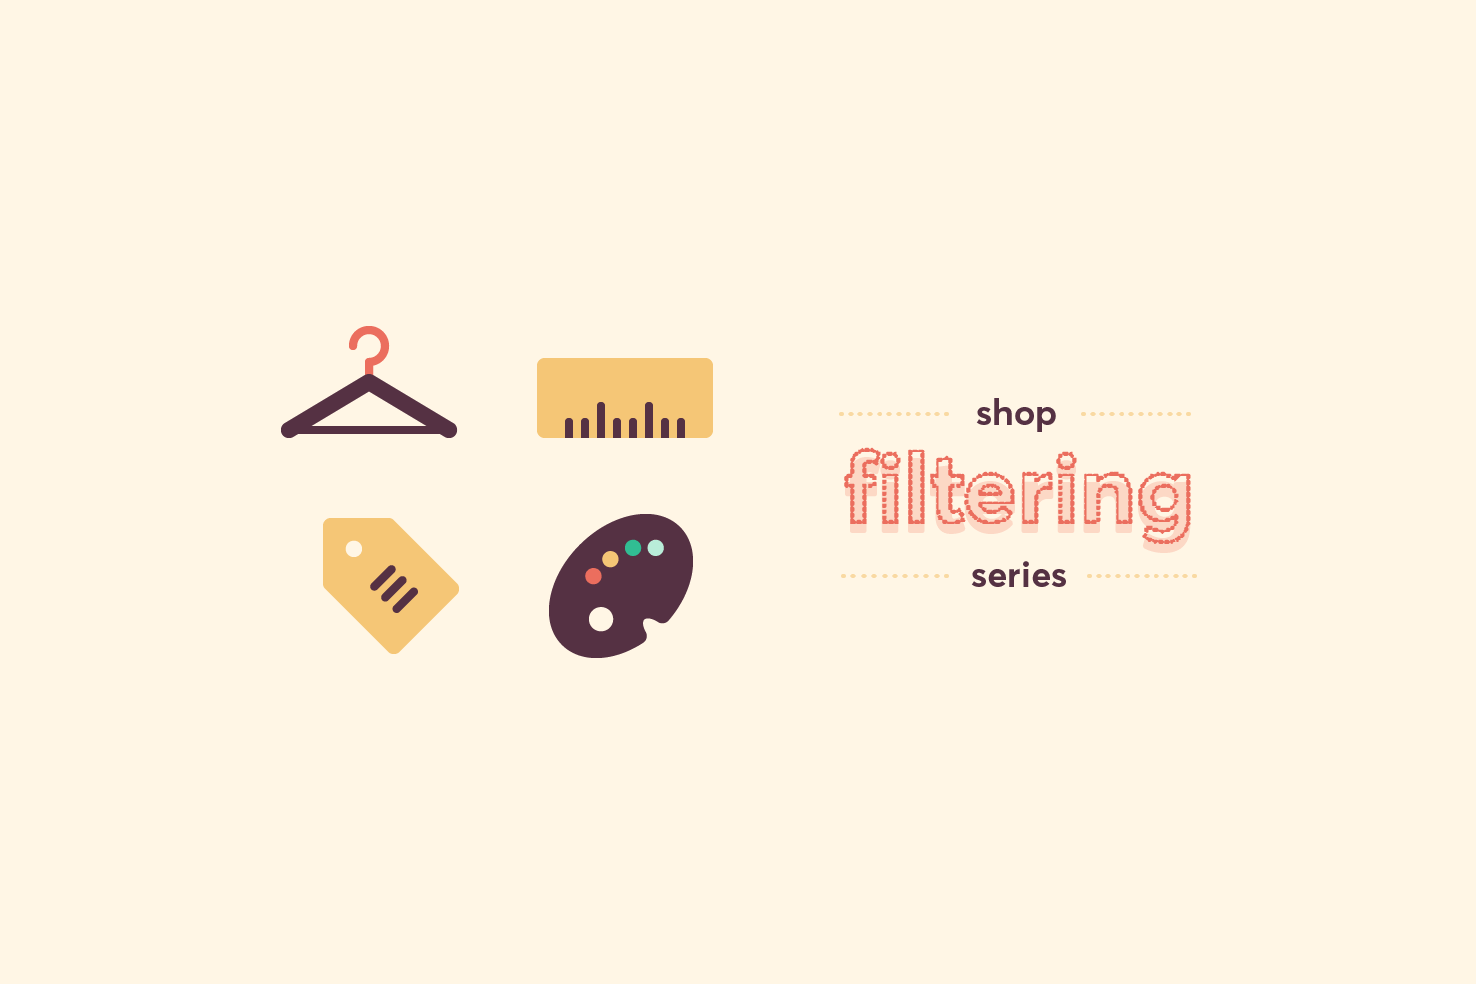
In the last post the basis for the visual style was set. In this post it will continue with that to complete the filters. There are some challenging areas like colour selection, as it can look overwhelming and how to handle the closing of filters.
Catch up
To catch up with where this post is, the files from the previous post are available.
Completed files
If you’d like to skip ahead and you can download the completed design files.
Colour reference
I have numbered colours in the table for easy reference.
| Number | Name | Hex |
|---|---|---|
| 1 | Light orange | #fcfaf7 |
| 2 | Orange | #e8bba2 |
| 3 | Dark blue | #1d232e |
| 4 | Blue | #2e323b |
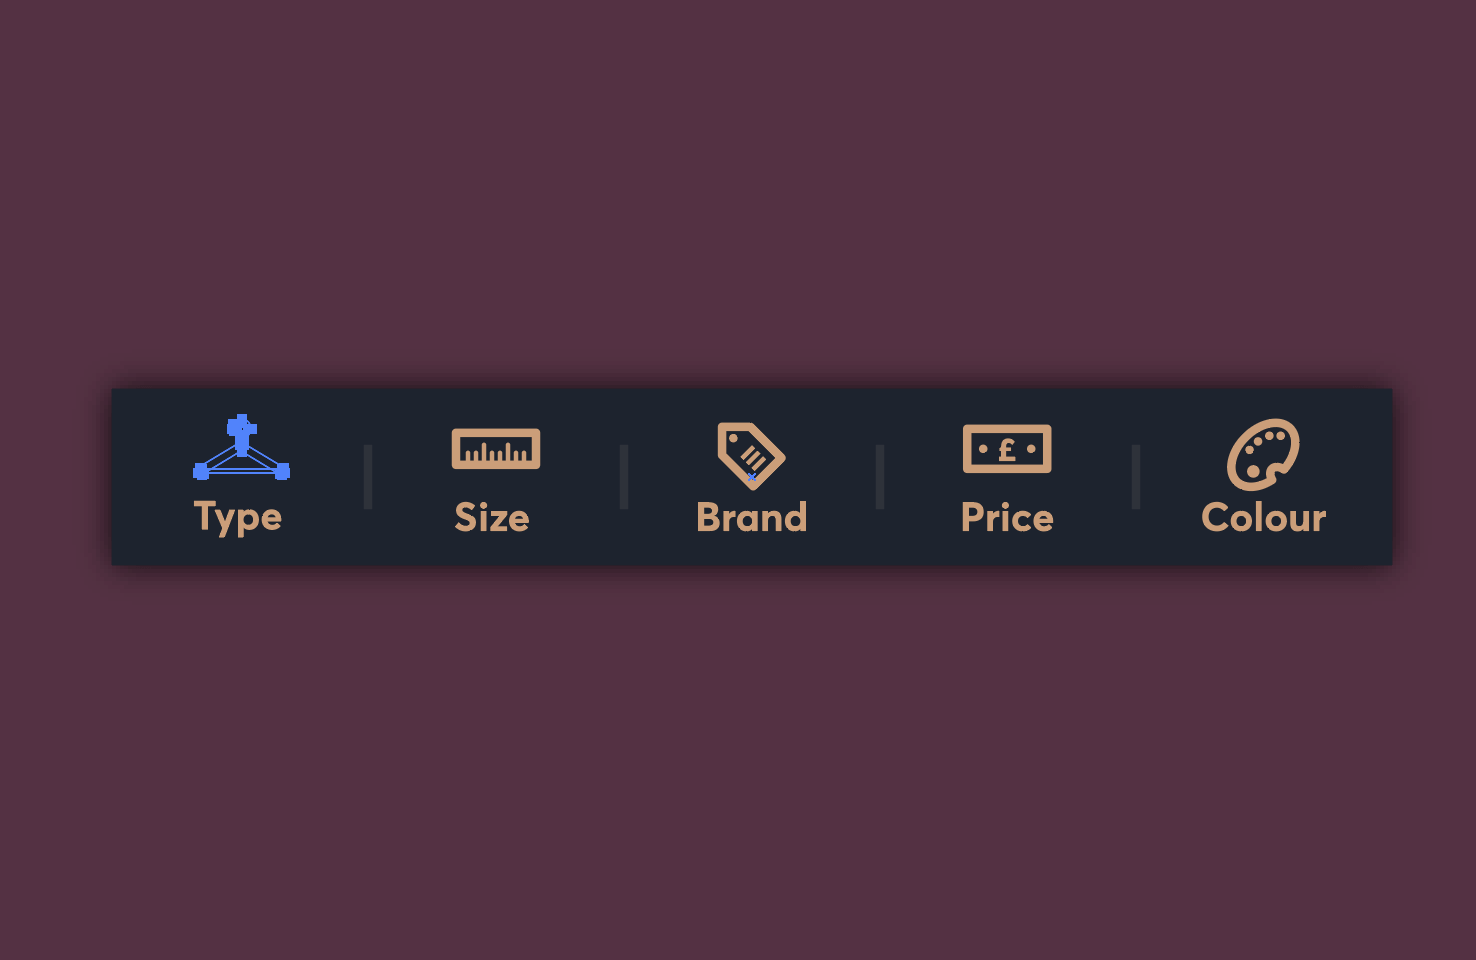
Highlight the open filter
Starting with the filter bar, it was left completed, but without a way to highlight the current filter being open.
Hiding the open filter icon in each artboard
The first step to this is to use the direct selection tool by pressing a.
Then select the icon path for the current icon. Changing the fill to colour 3, the filter background colour.
You’ll notice that by doing this none of the other symbols update. This is because this was made as a dynamic symbol. Which allows the editing of fills.
Repeat this for the other icons.
Change the text colour
Similarly to the icon, use the direct selection tool and select the text for each of the open filters.
Change the fill to colour 1. This is beneficial in the long run, as you may want to tweak things further.
You may need to expand your text to modify the colour by using either cmd + e or going to Object > Expand. An unfortunate limitation of dynamic symbols.
Close icon
At the start of this series I made some icons for download. Using the larger ‘x’ icon or making your own will be necessary for the next step.
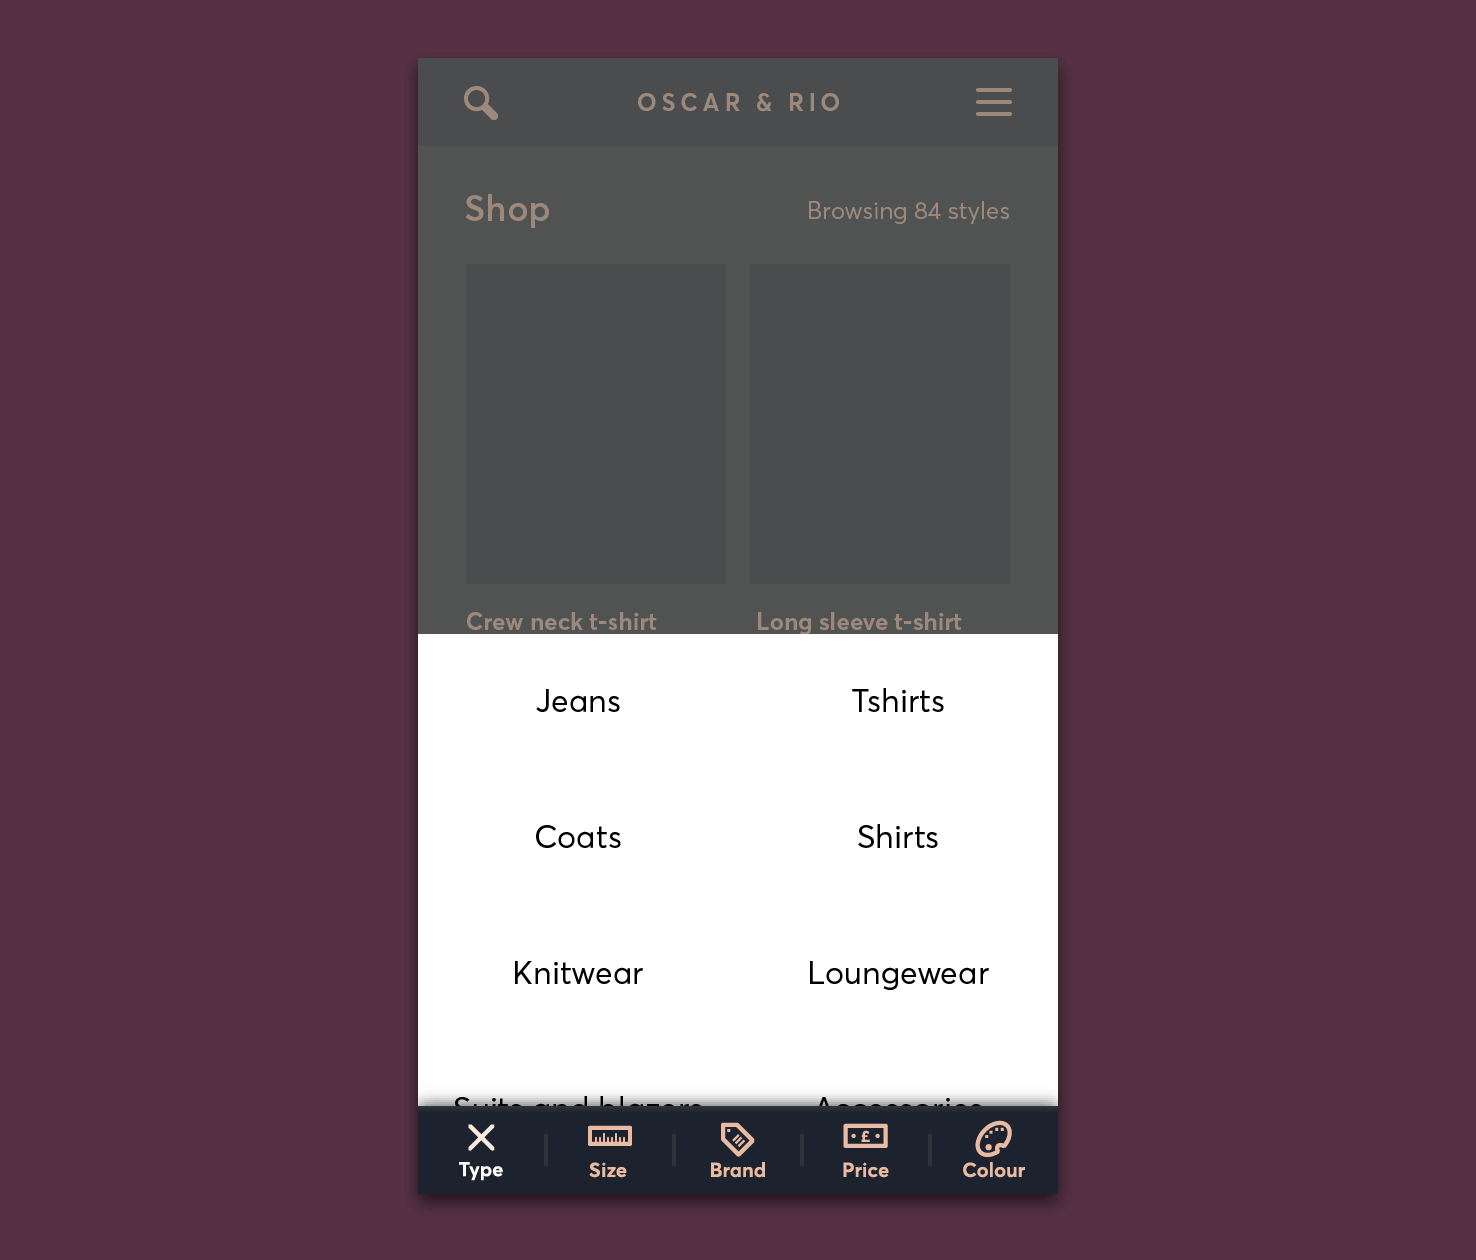
Copy the icon and paste it into the art board and place it above the text replacing where the previous icon was.
Getting into the filters
So the first few steps are ones that are pretty consistent across each filter.
Transparent overlay
The overlay is added to bring focus to the filters and add a layer of depth. It doesn’t currently fit in with the theme.
Change the fill to colour 3 and the opacity to 80%. The reason for the opacity change is to give a hint, as to what’s behind. When the transparency feels off it can make things look ‘muddy’ with the weird contrast it creates.
All text to be colour 2
Some quick colour changes can be made in the next couple of steps. Change all text that exists within the filters to colour 2. This will help legibility for the next step.
The quickest way to do this is by selecting a text object and going to Select > Same > Fill Color.
White backgrounds to colour 3
All the rectangles that have a white fill can be changed to colour 3. Excluding the size and colour filters, those will be done in a later step.
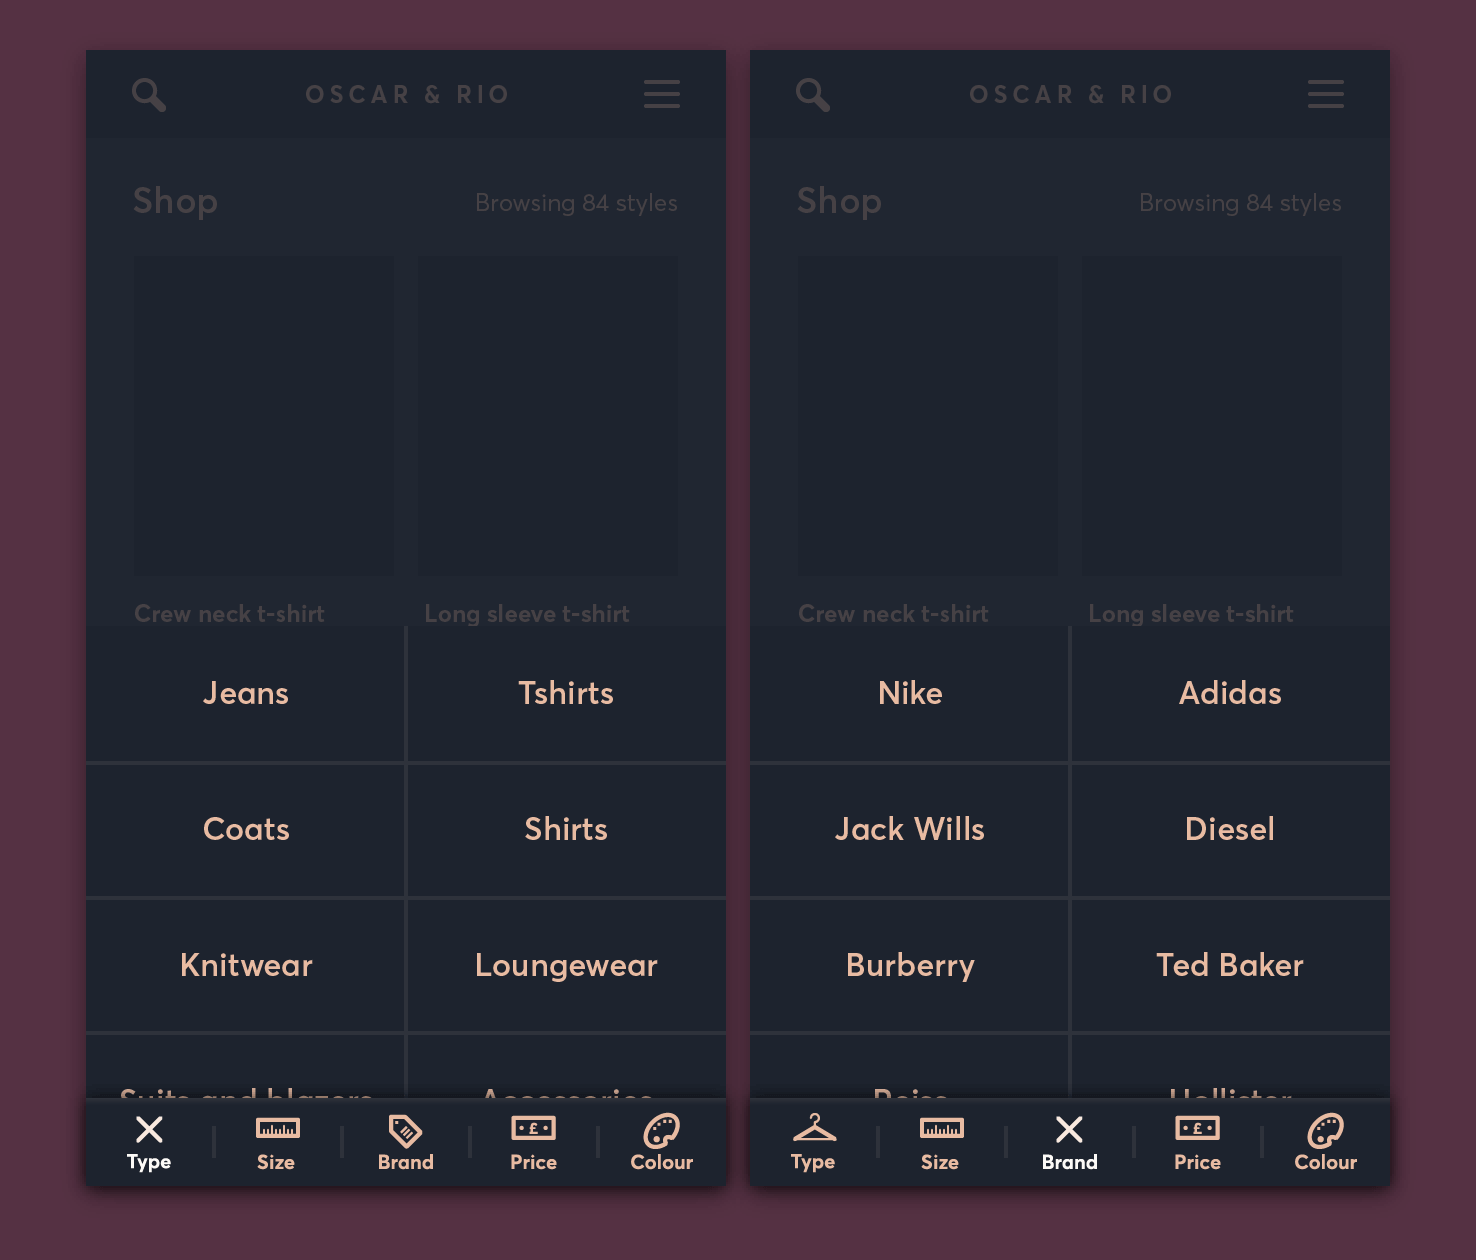
Type and brand
Both of these filters are very similar in style. In these steps you’re going to apply borders between the items, this will make things feel equally spaced and define boundaries.
A reference for the placement of the dividers.
Vertical divider
Firstly draw a vertical line by pressing /. Then make the line span the height of the types, which is 280px.
Change the stroke to colour 4 and the thickness to 2px. You should be able to copy and paste this in place on the brand artboard with cmd + f.
Horizontal dividers
Similarly to the vertical divider, draw a horizontal line. Same stroke weight and colour. Place them between each row of items.
Overlapping dividers
It’s likely the vertical divider is overlapping the filters. Select each of them and use cmd + g to group.
Then cmd + [ to move backwards to the point where they no longer overlap.
Increase font weight
To give the names a little more legibility increase their weight. Depending on the font you’re using, semibold should be enough of an increase.
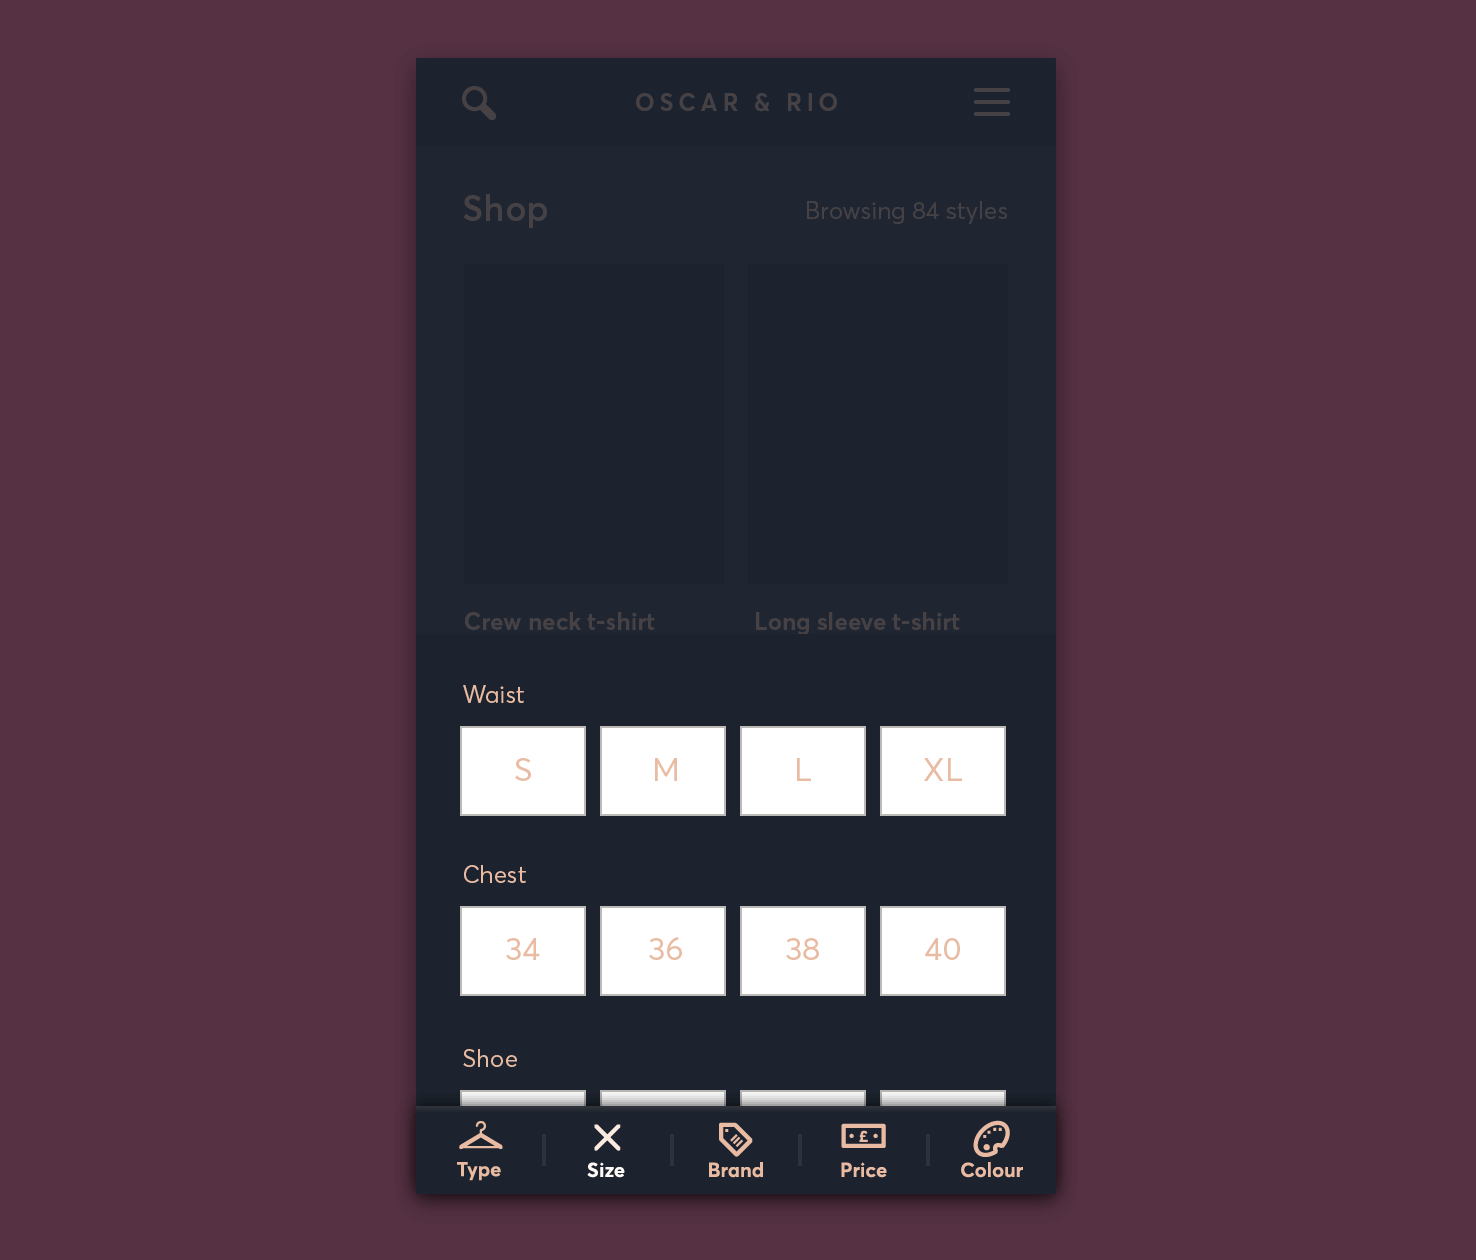
Size
Select all the size related things and use cmd + g to group them together. Double click the group, this should isolate the selection.
Fill and stroke
Highlight one of the rectangles that has a white fill and go to Select > Same > Fill and Stroke.
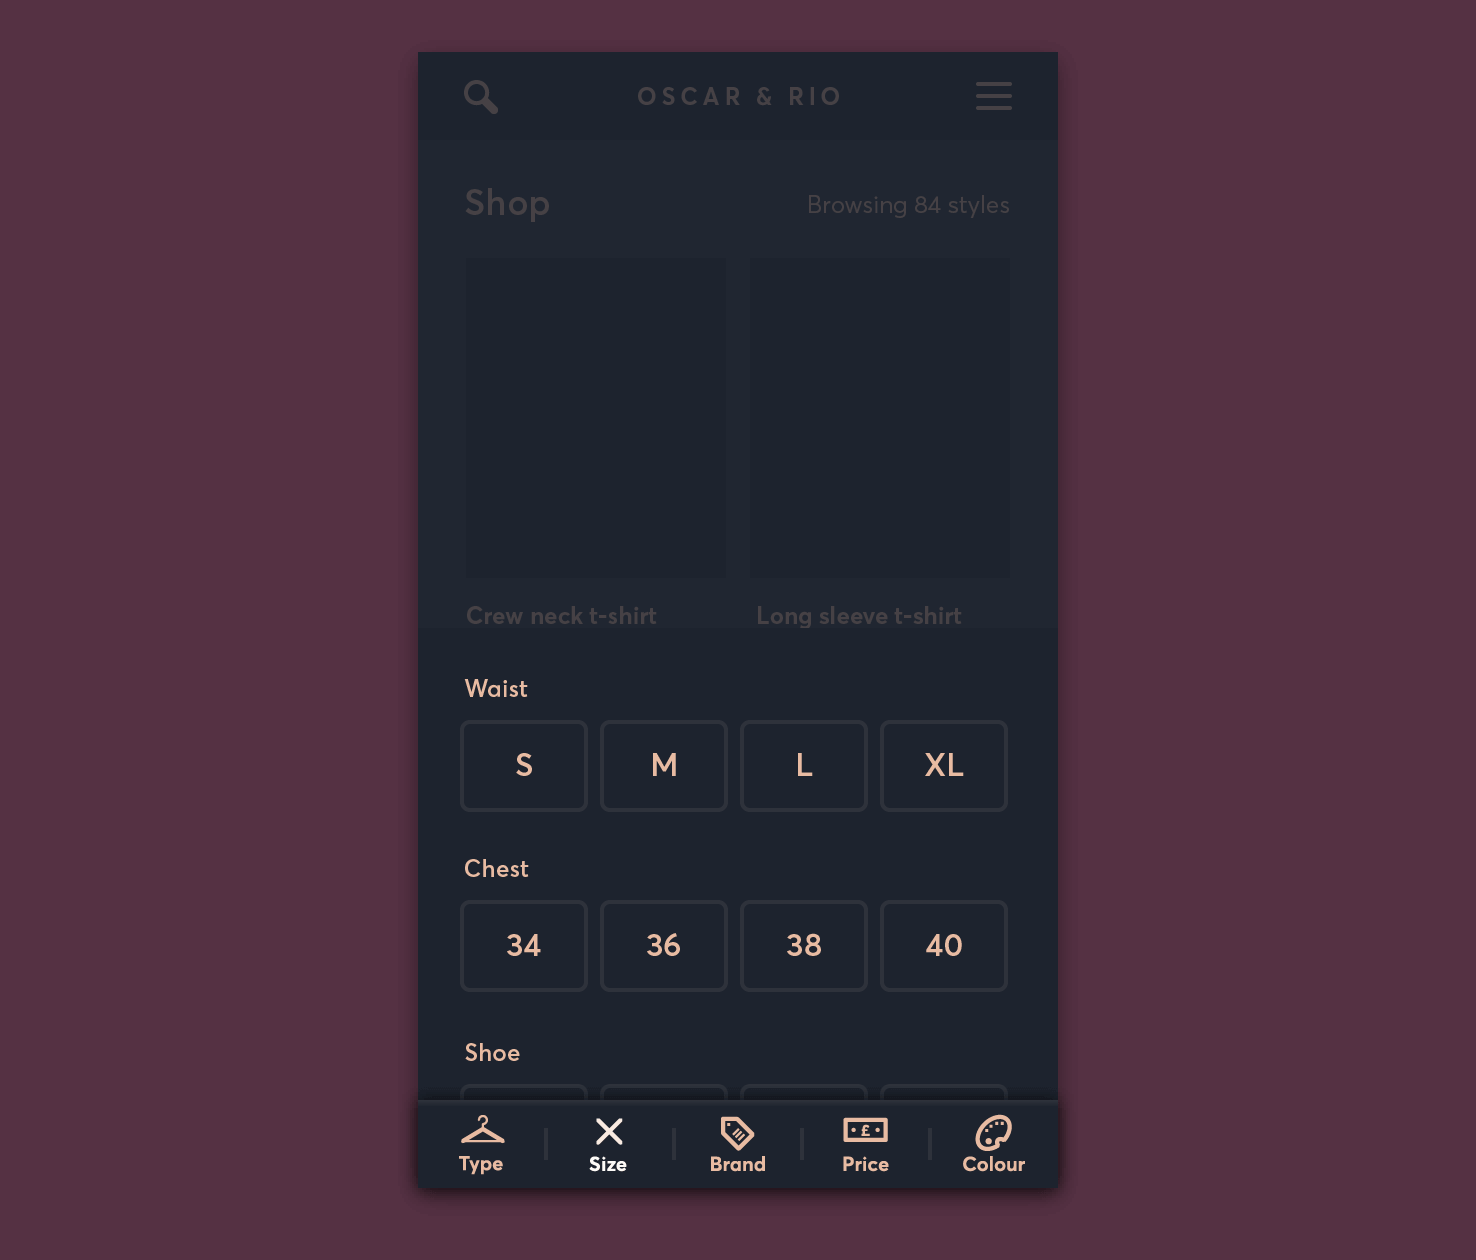
Change the stroke to colour 4, and the fill to colour 3.
Changing the corner radius
To change the corner radius you need to select the object and press a. This enables the ability to do that.
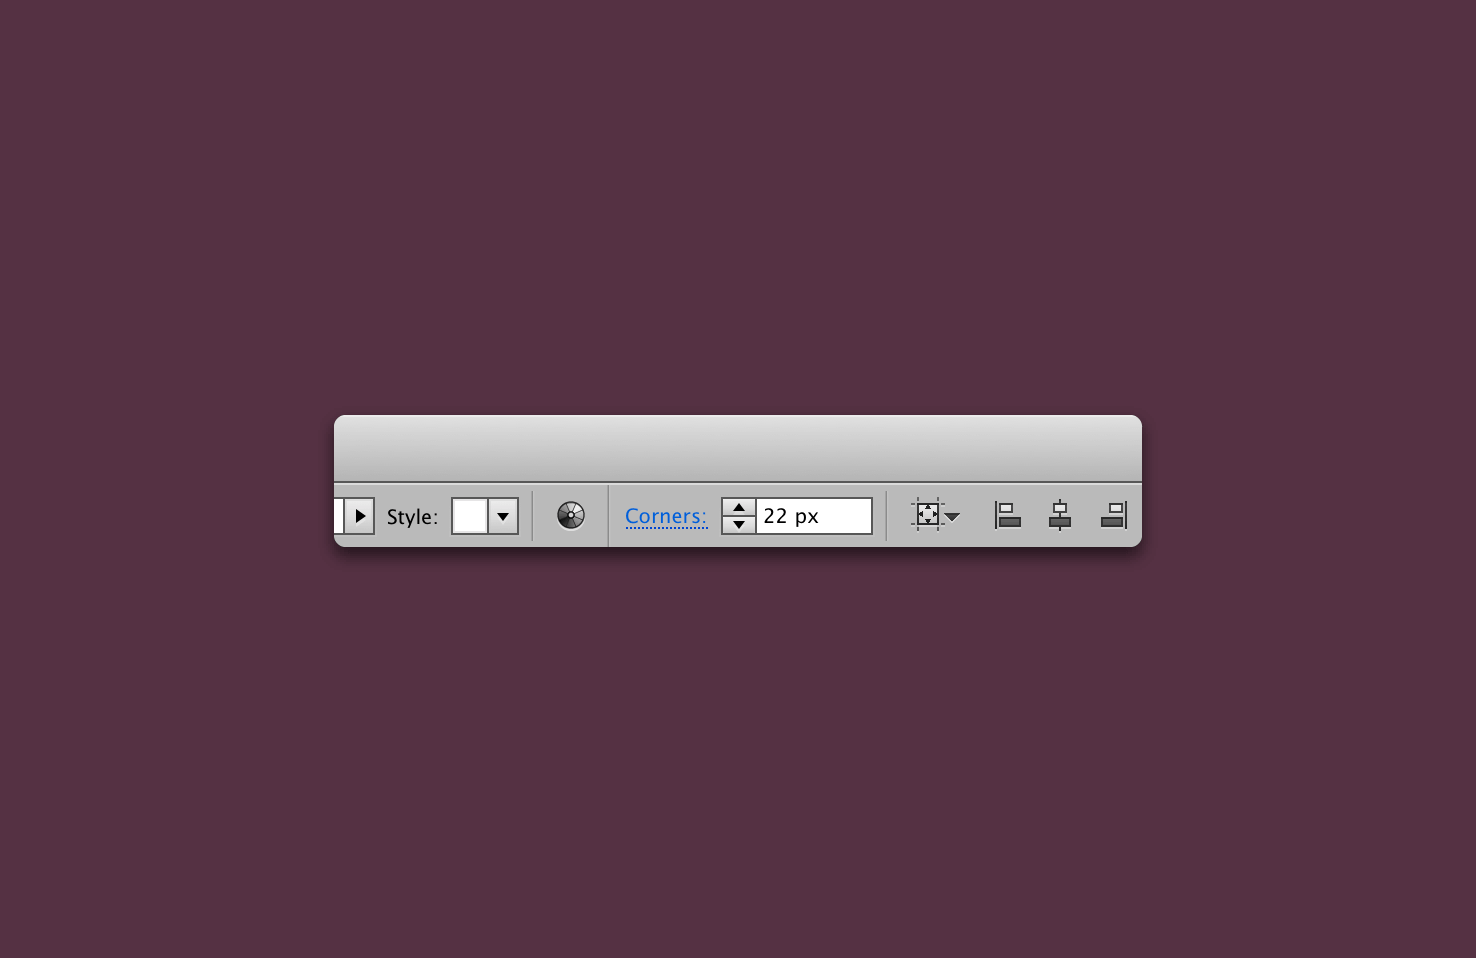
In the toolbar you should see ‘corners’ change the value to 4px.
Increase font weight
Again like the type and brand increase the font weight to semibold.
Price
The price needs to draw most attention to the handles.
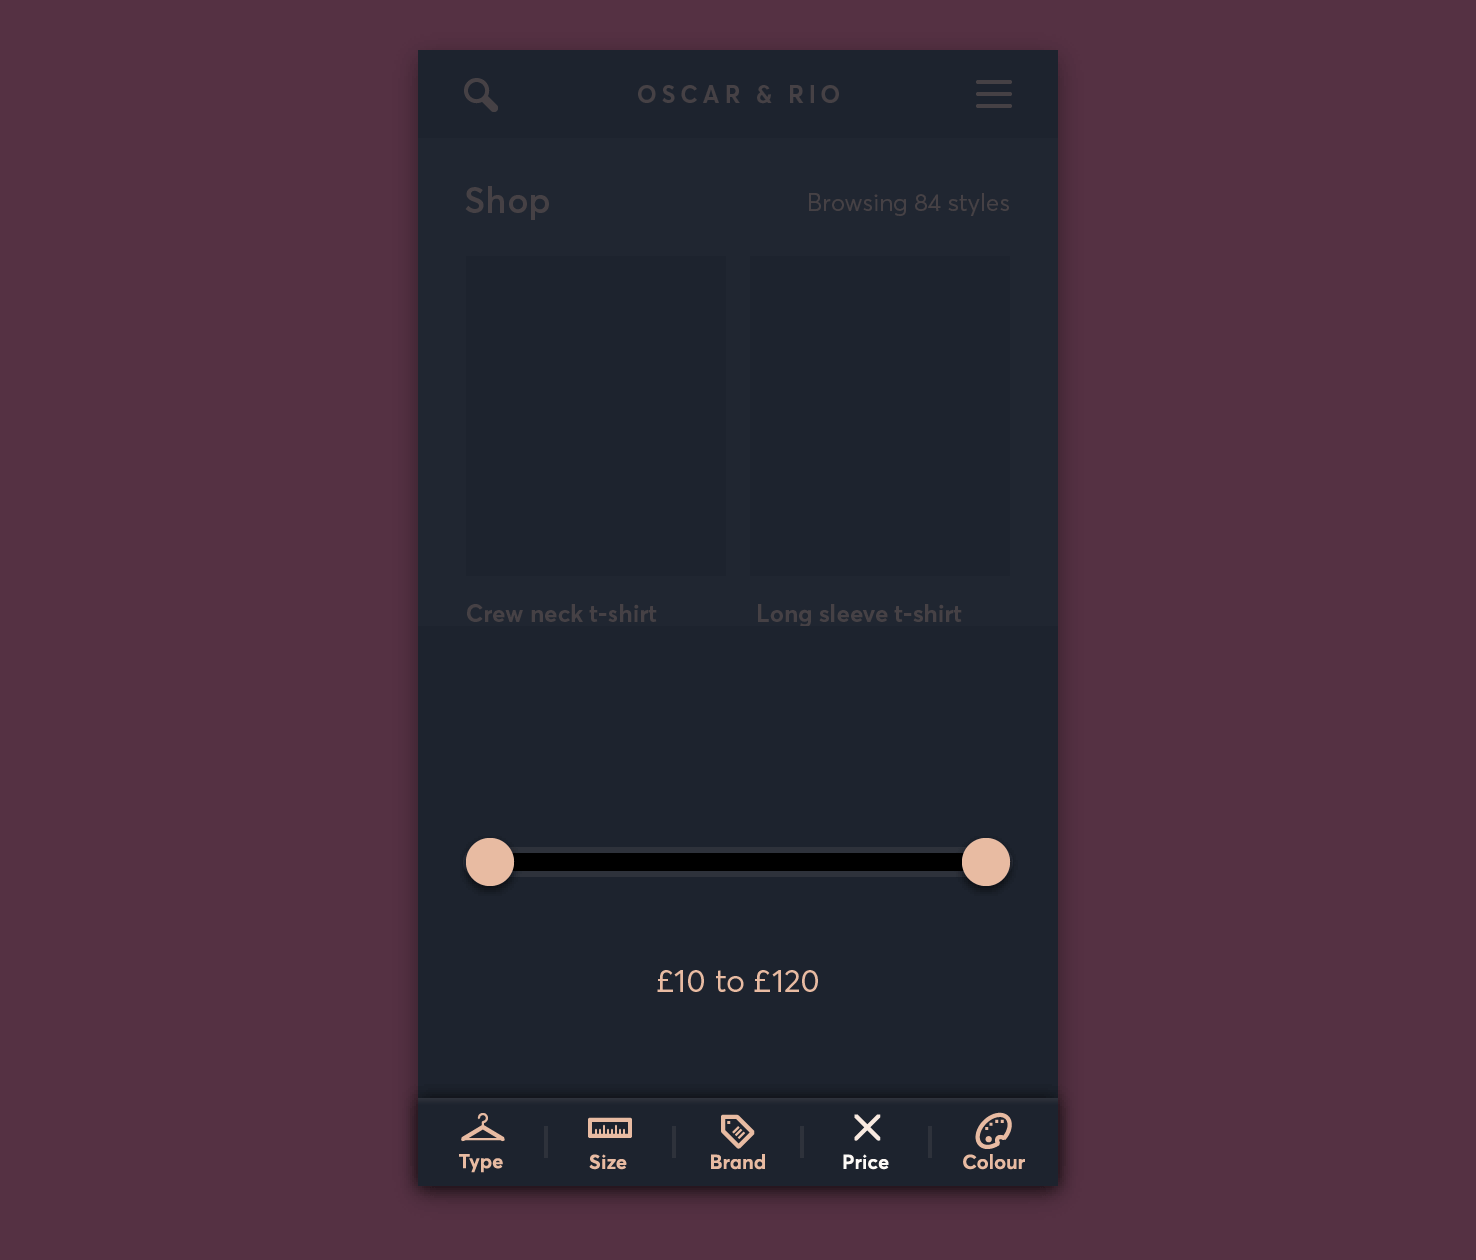
Handle fill & shadow
Select the handles and fill them with colour 2.
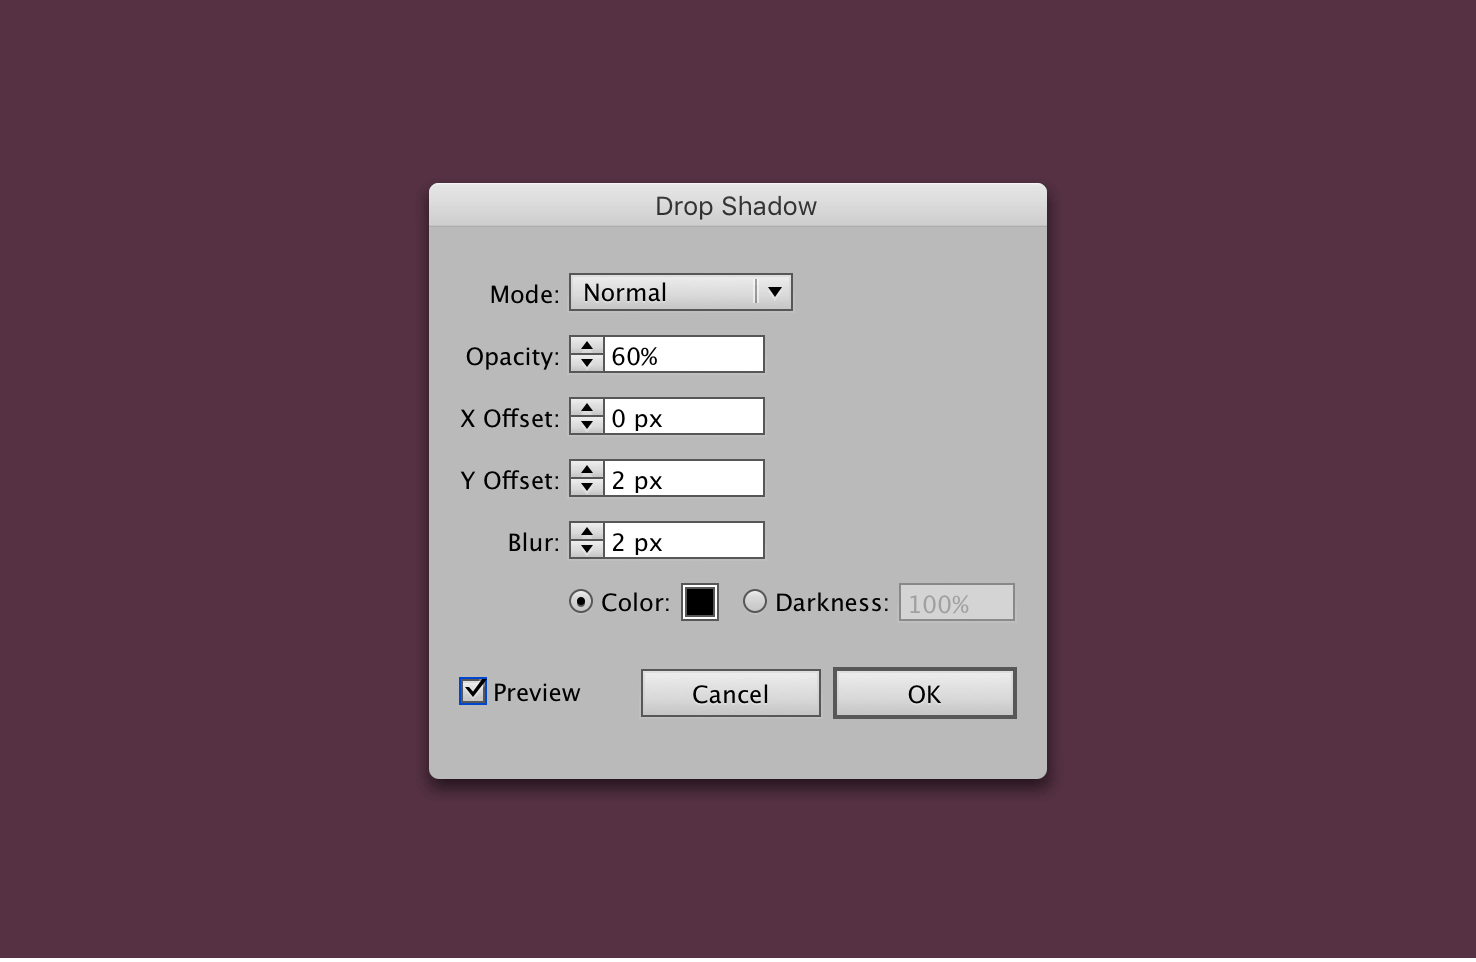
Select both of the handles, and go to the ‘fx’ menu and go to Stlylize > Drop Shadow. Adding the shadow gives subtle depth.
Range rectangle
Select the rectangle that connects the handles, and change the fill to black #000, and add the consistent 2px stroke in colour 4.
Increase font weight
Finally, increase the font weight of the price text to semibold.
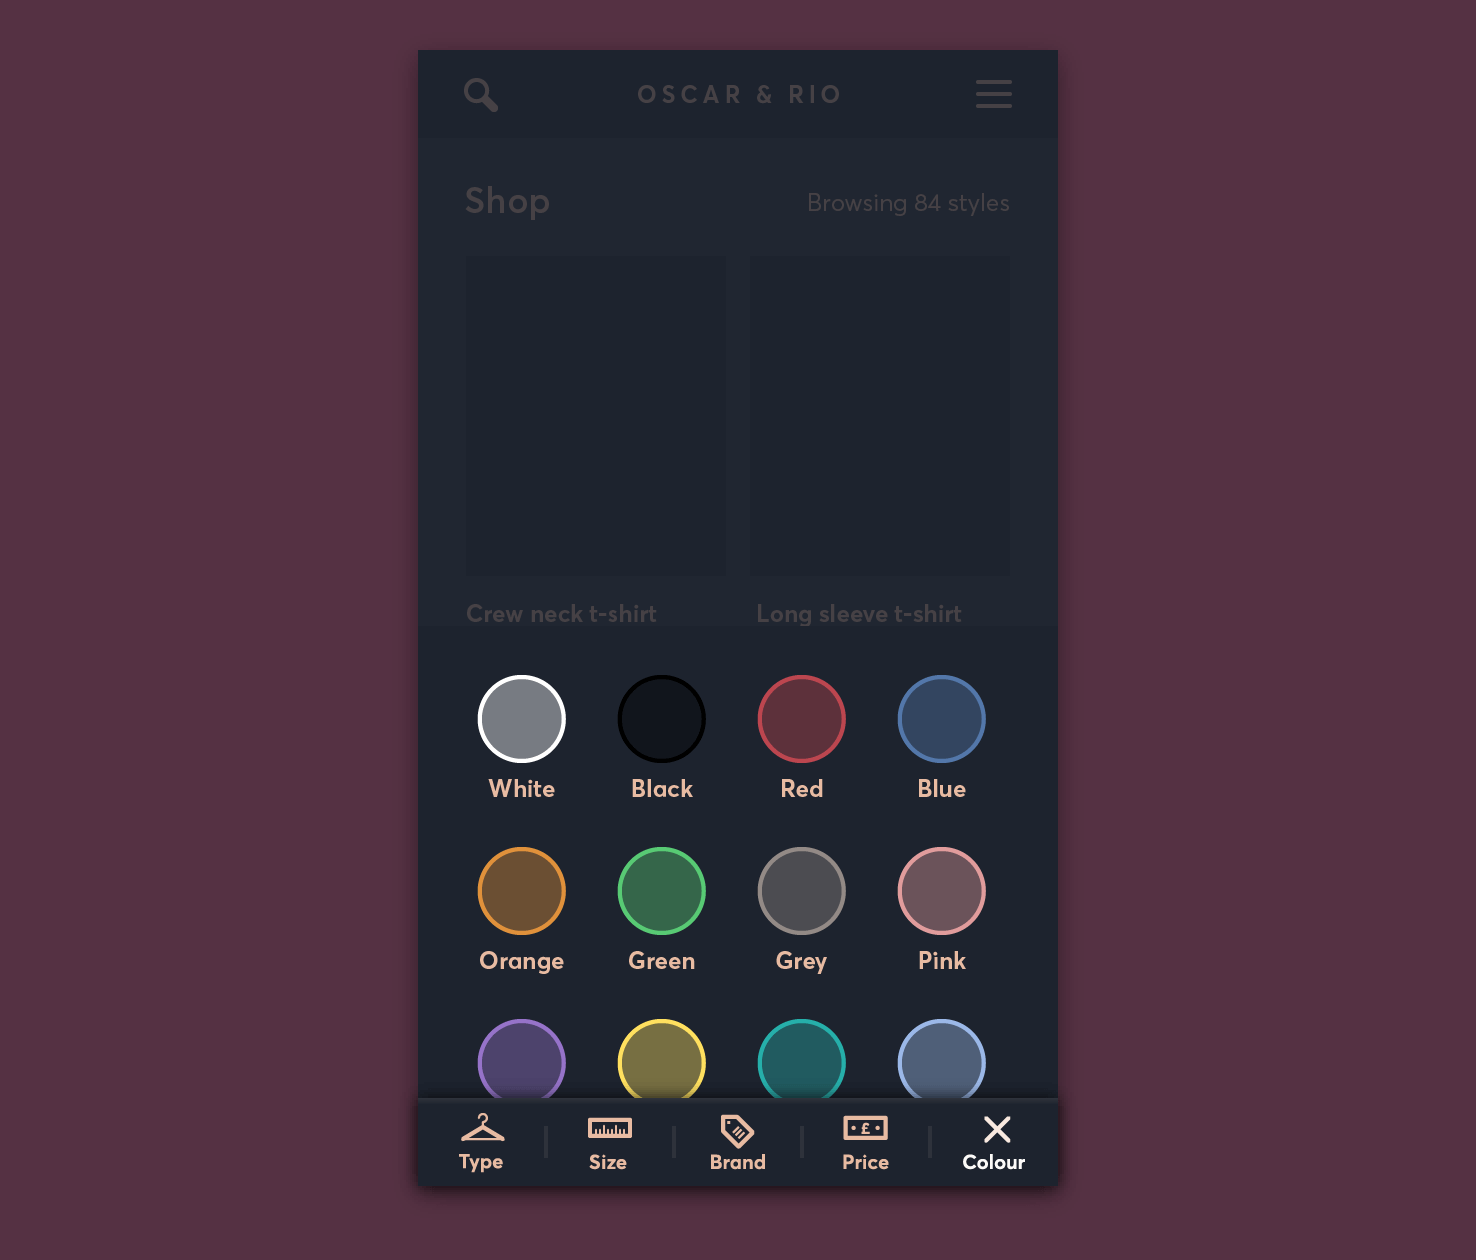
Colour
With price complete it moves on to colour, which is quite tricky. The shapes need a little adjustment and the colours need to have a subtlety about them. This is because it can look quite garish otherwise.
Make the text semibold
Like previous steps each colour name can be made semibold.
Resize the rectangles and make circular
Change the width to 44px, the height is fine. Change the corner radius to 22px.
Add a stroke and fill
Each circle has a 2px border and the relevant fill but at 40% opacity. This gives enough of an indication, without it being overwhelmingly colourful.
With the dark background colours can be lower in saturation and darker. The background brings them out. I’ve referenced the colours used in the table.
| Name | Hex |
|---|---|
| White | #fff |
| Black | #000 |
| Red | #bc464f |
| Blue | #5377aa |
| Orange | #e0913b |
| Green | #58ca74 |
| Grey | #938a86 |
| Purple | #9673c9 |
| Yellow | #ffe05f |
| Turquoise | #26afaa |
| Light blue | #9bb8e8 |
Align the text centrally
As the space has now increased between each item you want to make it feel more intentional.
Centralise the text by selecting the circle and text object, then click the circle again. Then using the align panel horizontally align them.
Once they’ve individually been aligned, you can align them centrally to the artboard.
That’s it
It’s complete, from here it’s time to code, but that’s for another time. Feel free to download the completed files. One oversight I made during this process was a way to clear the filters. How would you solve that?
View on Github