This post was published 10 years ago
There’s a chance things are out of date or no longer reflect my views today
Hero area series: Wordpress Customizer with selective refresh
Making the hero area editable in Wordpress using the Customizer API with selective refresh. The final post in the series, adding a smooth live editing experience.
— views

This post builds upon the previous one in making it editable with Wordpress, using the Customizer API and the newest functionality since 4.5 selective refresh. With this you can make a really smooth and quick editing experience.
The Wordpress Customiser API has been around for a while, and has been improved over the course of its existence. Recently in Wordpress 4.5 selective refresh was introduced. In the aim of making our code less repetitive.
Skip ahead
You can grab all the necessary files for the theme on Github.
Catch up
If you’d like to skip all the previous steps and work from the static HTML version, you can download the files from Github.
Continuing on with theme setup
If you’re carrying on from the previous post or have downloaded the files, read on.
Basic theme setup
The first steps involve preparing the theme to be used. A Wordpress theme requires at minimum a commented style.css and index.php.
Theme details
Open style.css and add the following before all the CSS that is currently there. Then renaming it to fit your needs.
/*
  Theme Name: customizer-hero
  Theme URI: https://iamsteve.me
  Author: Steve McKinney
  Author URI: https://iamsteve.me
   Description: This theme is purely to demonstrate editing a specific area of a website with customizer. It's not a fully functional theme in anyway. You can take the contents and generally drop them in with your theme.
  Version: 1.0.0
  Text Domain: customizer-hero
*/
Theme setup steps
The next steps are easier to present in a list.
- Rename index.html to front-page.php
- Add
index.php - Add
header.php - Add
footer.php - Add
functions.php - Add a
incfolder - In the
incfolder addcustomizer.php
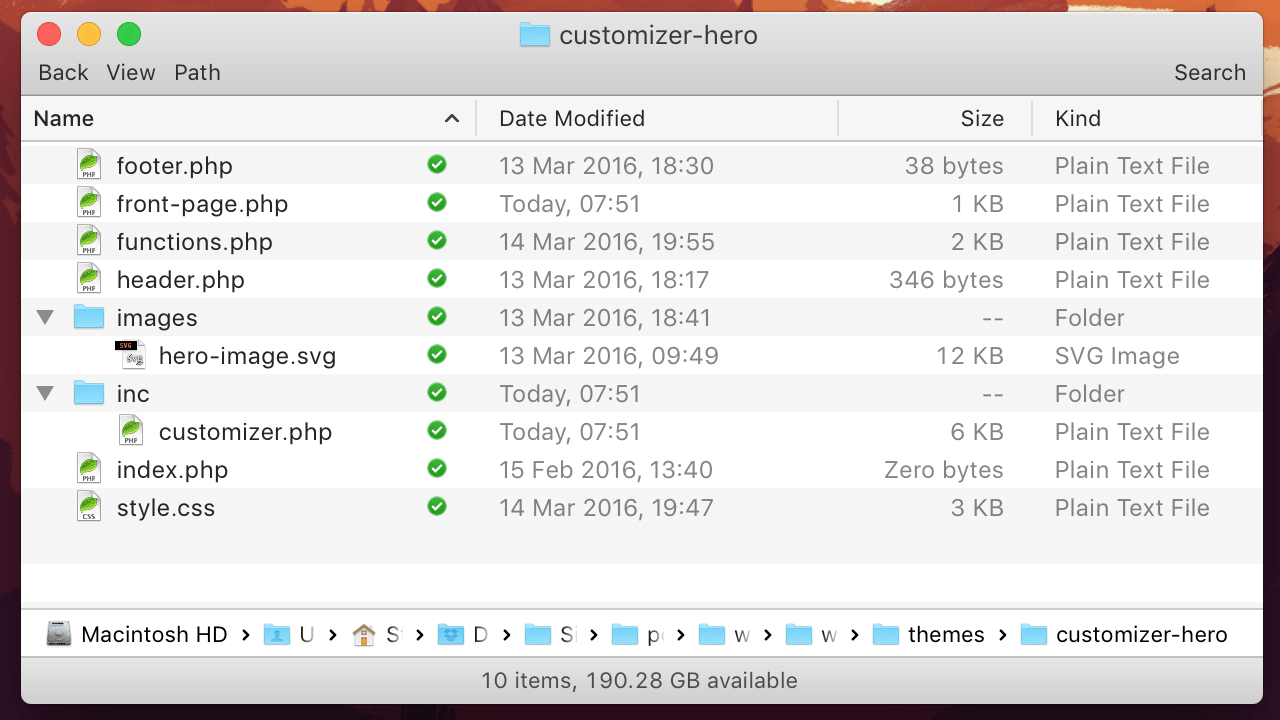
For reference this is what your file listing should look like.
front-page.php
Replace the contents of this file with the following. This makes the template a little Wordpress friendlier.
<?php
  /**
   * Template Name: Frontpage
   */
?>
<?php get_header(); ?>

<div class="hero">
  <div class="hero-content">
    <h1 class="hero-title">Edit live with the Wordpress Customizer</h1>
    <p class="hero-description">Using the Wordpress Customizer you can make updates to parts of your website with a live preview. This makes it easy to iterate on changes.</p>
    <p><a href="#" class="button">Learn how</a></p>
  </div>
  <div class="hero-image">
    <img src="<?php echo get_template_directory_uri(); ?>images/hero-image.svg">
  </div>
</div>

<?php get_footer(); ?>```

### header.php
Now that you have removed, the necessary parts from `front-page.php`. You need to add it into `header.php` and `footer.php`. The crucial part of this is `wp_head()`, ensuring all necessary CSS files are where they needs to be.

```php
<!DOCTYPE html>
<html <?php language_attributes(); ?>>
<head>
  <meta charset="<?php bloginfo( 'charset' ); ?>">
  <meta name="viewport" content="width=device-width">
  <link rel="profile" href="http://gmpg.org/xfn/11">
  <link rel="pingback" href="<?php bloginfo( 'pingback_url' ); ?>">

  <?php wp_head(); ?>
</head>

<body <?php body_class(); ?>>
footer.php
Add the following to footer.php. The crucial part of this is wp_footer() which ensures all scripts are where they need to be.
<?php wp_footer(); ?>

</body>
</html>
Functions setup
Now that your theme is setup, open functions.php and add the following. The code adds an image size for the hero image, the fonts, CSS, and includes customizer.php. The use of these will become clearer later in the post.
/**
 * Theme setup
 */
function customizer_hero_setup()
{
  add_image_size('hero-image', 1080, '');
}

add_action( 'after_setup_theme', 'customizer_hero_setup' );

/**
 * Enqueue scripts and styles.
 */
function customizer_hero_scripts()
{
  $query_args = array(
    'family' => 'Raleway:900,800,700|Merriweather'
  );
  wp_register_style( 'fonts', add_query_arg( $query_args, 'https://fonts.googleapis.com/css' ), array('customizer-hero-style'), null );
  wp_enqueue_style( 'customizer-hero-style', get_stylesheet_uri() );
}

add_action( 'wp_enqueue_scripts', 'customizer_hero_scripts' );

/**
 * Include theme customizer
 */
require get_template_directory() . '/inc/customizer.php';
Customizer setup
Now open inc/customizer.php, drop in the following code. This will make everything work, following this I will explain further.
It’s a simple class, that I have followed from the Theme Customizer API documentation. Using this structure you should find it to be more manageable. There are small differences than using a regular function setup, the scope of this post isn’t to go into detail, but rather guide the way to use them.
/**
 * Contains methods for customizing the theme customization screen.
 * Using the example class from with modifications
 *
 * @link http://codex.wordpress.org/Theme_Customization_API
 */
class Hero_Customize
{
  /**
   * Register all fields necessary for editing the hero area
   */
  public static function register($wp_customize)
  {
    $transport = ( $wp_customize->selective_refresh ? 'postMessage' : 'refresh' );

    // Add hero section
    $wp_customize->add_section( 'hero', array(
      'title' => 'Hero',
      'priority' => 0
    ));

    // Add setting & control for hero title
    $wp_customize->add_setting( 'hero_title', array(
      'default' => 'Edit live with the Wordpress Customizer',
      'transport' => $transport
    ));

    $wp_customize->add_control( 'hero_title', array(
      'label' => 'Title',
      'section' => 'hero',
      'settings' => 'hero_title',
      'type' => 'text'
    ));

    // Add setting & control for hero description
    $wp_customize->add_setting( 'hero_description', array(
      'default' => 'Using the Wordpress Customizer you can make updates to parts of your website with a live preview. This makes it easy to iterate on changes.',
      'transport' => $transport
    ));

    $wp_customize->add_control( 'hero_description', array(
      'label' => 'Description',
      'section' => 'hero',
      'settings' => 'hero_description',
      'type' => 'textarea'
    ));

    // Add setting & control for hero image
    $wp_customize->add_setting( 'hero_image', array(
      'default' => get_template_directory_uri() . '/images/hero-image.svg',
      'transport' => $transport
    ));

    $wp_customize->add_control(
      new WP_Customize_Cropped_Image_Control( $wp_customize, 'hero_image', array(
        'label' => 'Image',
        'section' => 'hero',
        'context' => 'hero-image',
        'flex_width' => false,
        'flex_height' => true,
        'width' => 1080,
        'height' => 1080
      ) )
    );

    // Add setting & control for hero background color
    $wp_customize->add_setting( 'hero_background_color', array(
      'default' => '#c3f2f5',
      'transport' => $transport
    ));

    $wp_customize->add_control(
      new WP_Customize_Color_Control( $wp_customize, 'hero_background_color', array(
        'label' => 'Background color',
        'section' => 'hero',
        'settings' => 'hero_background_color'
      ) )
    );

    // Select a page
    $wp_customize->add_setting( 'hero_page', array(
      'type' => 'option',
      'transport' => 'none'
    ));

    $wp_customize->add_control( 'hero_page', array(
      'label' => 'Link to page',
      'section' => 'hero',
      'type' => 'dropdown-pages',
      'settings' => 'hero_page'
    ));

    // Add setting & control for button text
    $wp_customize->add_setting( 'hero_button_text', array(
      'default' => 'Find out how',
      'transport' => $transport
    ));

    $wp_customize->add_control( 'hero_button_text', array(
      'label' => 'Button text',
      'section' => 'hero',
      'settings' => 'hero_button_text',
      'type' => 'text'
    ));
  }

  public function refresh( WP_Customize_Manager $wp_customize )
  {
    // Abort if selective refresh is not available.
    if ( ! isset( $wp_customize->selective_refresh ) ) return;

    // Title
    $wp_customize->selective_refresh->add_partial('hero_title', array(
      'selector' => '.hero-title',
      'settings' => 'hero_title',
      'render_callback' => function() {
        return get_theme_mod('hero_title');
      }
    ) );

    // Description
    $wp_customize->selective_refresh->add_partial('hero_description', array(
      'selector' => '.hero-description',
      'settings' => 'hero_description',
      'render_callback' => function() {
        return get_theme_mod('hero_description');
      }
    ) );

    // Image
    $wp_customize->selective_refresh->add_partial('hero_image', array(
      'selector' => '.hero-image img',
      'settings' => 'hero_image',
      'render_callback' => self::hero_image_partial()
    ) );

    // Background colour
    $wp_customize->selective_refresh->add_partial('hero_background_color', array(
      'selector' => '#hero-css',
      'settings' => 'hero_background_color',
      'render_callback' => function() {
        echo self::css('.hero', 'background-color', 'hero_background_color');
      }
    ) );

    // Button text
    $wp_customize->selective_refresh->add_partial('hero_button_text', array(
      'selector' => '.hero .button',
      'settings' => 'hero_button_text',
      'render_callback' => function() {
        return get_theme_mod('hero_button_text');
      }
    ) );
  }

  /**
   * For hooking into `wp_head` mostly to output CSS
   */
  public function output()
  {
    echo '<style id="hero-css">';
    echo self::css('.hero', 'background-color', 'hero_background_color');
    echo '</style>';
  }

  /**
   * This will generate a line of CSS for use in header output. If the setting
   * ($mod_name) has no defined value, the CSS will not be output.
   *
   * @uses get_theme_mod()
   * @param string $selector CSS selector
   * @param string $property The name of the CSS *property* to modify
   * @param string $mod_name The name of the 'theme_mod' option to fetch
   * @param bool $echo Optional. Whether to print directly to the page (default: true).
   * @return string Returns a single line of CSS with selectors and a property.
   */
  public static function css( $selector, $property, $theme_mod )
  {
    $return = '';
    $theme_mod = get_theme_mod($theme_mod);

    if ( ! empty( $theme_mod ) )
    {
      $return = sprintf('%s { %s:%s; }',
        $selector,
        $property,
        $theme_mod
      );

      return $return;
    }
  }

  /**
   * Reusable partials
   */
  public static function hero_image_partial()
  {
    return wp_get_attachment_image(get_theme_mod('hero_image'), 'hero-image');
  }
}

// Setup the Theme Customizer settings and controls
add_action( 'customize_register', array('Hero_Customize', 'register') );

// Setup the selective refresh functionality
add_action( 'customize_register', array('Hero_Customize', 'refresh') );

// Output custom CSS to live site
add_action( 'wp_head', array('Hero_Customize' , 'output') );

/**
 * Friendlier access for template files
 */
function hero_image()
{
  return Hero_Customize::hero_image_partial();
}
Register function
From lines 13 to 105, you register all the editable fields. It’s then hooked into customize_register.
add_action( 'customize_register', array('Hero_Customize', 'register') );Add the hero section
A section takes 4 parameters, however, you’re only using two, giving the section a title and a priority. The priority means it should be at the top, as this is the first section on the page it makes sense.
$wp_customize->add_section( 'hero', array(
  'title' => 'Hero',
  'priority' => 0
));
Add a text setting
The simplest setup for a Customizer field is text. Pass the ID, a unique name and an array of arguments. default and transport are the ones you will set most frequently.
$wp_customize->add_setting( 'hero_title', array(
  'default' => 'Edit live with the Wordpress Customizer',
  'transport' => $transport
));
Add a text control
For every setting, you need a control. This is what allows you to display it in the Customizer UI. This requires an ID, this doesn’t have to be the same as the setting, however, I see no reason for it to be different.
$wp_customize->add_control( 'hero_title', array(
  'label' => 'Title',
  'section' => 'hero',
  'settings' => 'hero_title',
  'type' => 'text'
));
The arguments are the most important here, this defines how and where the control shown. label is the label of the field, you can complement that with a description, although, it’s not required.
section relates to the section you setup earlier, in this case hero. settings is the ID of the one you defined when adding a setting, in this case hero_title.
Next you will want to define a type, there are a variety of types, text being the default. You can choose from textarea, checkbox, radio, select or dropdown-pages. If you want to do something fancier, like add an image or colour picker, that requires a different setup, which will be covered shortly.
Adding a cropped image control
All controls have settings setup in a similar way, so it’s not worth repeating the add_setting functionality. The control is the important part to cover, overall there is some similarities to simpler controls, but they are initialised in a different way due to the additional options they have.
$wp_customize->add_control(
  new WP_Customize_Cropped_Image_Control( $wp_customize, 'hero_image', array(
    'label' => 'Image',
    'section' => 'hero',
    'context' => 'hero-image',
    'flex_width' => false,
    'flex_height' => true,
    'width' => 1080,
    'height' => 1080
  ) )
);
A cropped image control has quite a lot of options, that allow for some nice flexibility. It has the same label and section arguments, but the reason for it being separate is in the context, flex_width, flex_height, width and height.
These arguments are fairly descriptive, however, the context allows the media library have somewhere to assign these images to. In Wordpress you can allow for images to be used everywhere, or one area, such as a post type.
By default Wordpress won’t allow upload of SVGs, you can use a plugin to enable this, I will leave that up to you.
Colour control
The colour control works like the cropped image control, in that we have to initialise it in a similar way. The options are easier to set, a label, section and settings ID.
$wp_customize->add_control(
  new WP_Customize_Color_Control( $wp_customize, 'hero_background_color', array(
    'label' => 'Background color',
    'section' => 'hero',
    'settings' => 'hero_background_color'
  ) )
);
Appears simple, however, this is what the functions defined later in the class are for. output() and css(). Once a colour is passed, output() will be run.
/**
 * For hooking into `wp_head` mostly to output CSS
 */
public static function output()
{
  echo '<style id="hero-css">';
  echo self::css('.hero', 'background-color', 'hero_background_color');
  echo '</style>';
}
This refers to the other function css(). Which is a reusable function, should we define more controls that require CSS updating. It takes three arguments, the CSS selector, the style property and the theme mod.
In your case the selector is .hero, the property is background-color and the theme mod is hero_background_color.
Dropdown pages
To select a page to link to you need to set up the setting a little differently. Instead of relying on the default type of theme_mod, use option. It’s a small change, but it means the customizer UI remembers the selected value once saved.
$wp_customize->add_setting( 'hero_page', array(
  'type' => 'option',
  'transport' => 'none'
));
Also for this the transport set to none, as there is no visual update here, it didn’t feel necessary to cause a delay.
$wp_customize->add_control( 'hero_page', array(
  'label' => 'Link to page',
  'section' => 'hero',
  'type' => 'dropdown-pages',
  'settings' => 'hero_page'
));
Finally, for the page link, the type is dropdown-pages, this is basically says use a select element with pages in it.
Selective refresh
Now for the final part of the code, everything needs to selectively refresh. This is new functionality and it’s great, it makes life so much easier. It means that no separate JavaScript is required. You need to write a little extra PHP, although you could argue you don’t as you can reuse it in templates.
There is a major issue with settings using the
postMessagetransport, any logic used in PHP to render the setting in the template has to be duplicated in JavaScript.
Setup
From around lines 107 to 165 sets up the selective refresh functionality. You work with the fields in a similar way to that when registering them. Again, you hook into customize_register to make it all work.
add_action( 'customize_register', array('Hero_Customize', 'refresh') );All refreshing is based around adding partials to handle the data, some requiring more work than others.
Refresh text or textarea
Text again is the simplest, passing a selector, the settings ID and render_callback which is where the data is pulled from to update the change. This applies to the title, subtitle and button text.
$wp_customize->selective_refresh->add_partial('hero_title', array(
  'selector' => '.hero-title',
  'settings' => 'hero_title',
  'render_callback' => function() {
    return get_theme_mod('hero_title');
  }
) );
The selector is in reference to what it will be in your code, so that’s .hero-title. Wordpress uses that to modify the contents based upon render_callback.
Using render_callback it introduces you to the functions that will need to be used in the template. Firstly, you pass an anonymous function, which returns the value of get_theme_mod('hero_title'). This can be a separate function returns that value, for use in your template too.
Refresh the image
There is one difference for refreshing an image with the render callback for the image, it’s using a function within your class. This returns the updated image.
$wp_customize->selective_refresh->add_partial('hero_image', array(
  'selector' => '.hero-image img',
  'settings' => 'hero_image',
  'render_callback' => self::hero_image_partial()
) );
When you want to refer to a static method (function) within the class you have to refer to self::. It’s basically saying it’s within this class, as you could have a function named the same outside of the class.
Refresh the background color
Again, what I really like about the selective refresh setup is the familiarity it builds. The only differences are the selector and render_callback.
$wp_customize->selective_refresh->add_partial('hero_background_color', array(
  'selector' => '#hero-css',
  'settings' => 'hero_background_color',
  'render_callback' => function() {
    return self::css('.hero', 'background-color', 'hero_background_color');
  },
) );
Particularly here, is where the selective refresh functionality shines. You’ve already setup the necessary code to set the background colour through PHP, you would have to do this again in JavaScript, if selective refresh didn’t exist.
HTML Setup
Now the functionality is out of the way it’s time to modify the existing HTML. The modifications revolve around outputting each of the Customizer fields, and checking for their existence. In theory you could have none of them, it’s more likely you may not want a description. So we need to ensure there are no empty elements left behind.
What front-page.php should end up as
<?php
/**
* Template Name: Frontpage
*/
?>
<?php get_header(); ?>
<div class="hero">
<div class="hero-content">
<?php
// Check if the title exists
if( $title = get_theme_mod('hero_title') )
{
  echo '<h1 class="hero-title">' . $title . '</h1>';
}
// Check if the subtitle exists
if( $subtitle = get_theme_mod('hero_subtitle') )
{
echo '<p class="hero-description">' . $subtitle . '</p>';
}
// Check if the page has been selected and it has text
// a button without link or text isn’t ideal
if ( $link = get_option('hero_page') && $text = get_theme_mod('hero_button_text') )
{
  echo '<p><a href="' . get_permalink($link) . '" class="button">' . $text . '</a></p>';
}
?>
</div>
<div class="hero-image">
<?php
// Check if the image really exists
if ( ! empty(hero_image()) && null !== hero_image() )
{
echo hero_image();
}
// Otherwise start with the default image
else
{
echo '<img src="' . get_template_directory_uri() . '/images/hero-image.svg' . '">';
}
?>
</div>
</div>
<?php get_footer(); ?>Basics of getting a field
Each field by default is a theme mod, which you setup earlier with the settings.
echo get_theme_mod('hero_title');All but one case uses theme mods, and that’s an option, which we used for the hero_page.
echo get_option('hero_page');Check for existence and show field
Each field needs to be checked it exists, then output the HTML and value.
if( $title = get_theme_mod('hero_title') )
{
echo '<h1 class="hero-title">' . $title . '</h1>';
}Getting a page link
Some options and theme mods will return a number, which is the ID of what’s being returned. This is really handy, in our case you can use it to get the link.
if ( $link = get_option('hero_page') && $text = get_theme_mod('hero_button_text') )
{
echo '<p><a href="' . get_permalink($link) . '" class="button">' . $text . '</a></p>';
}You could also use that to get all the information about that page and do away with the need for customising the title and description.
Getting the image
Similarly for an image, it returns an ID, however this has already been handled in customizer.php, inside Hero_Customize class you have hero_image_partial(). It uses the ID from the theme mod, which allows wp_get_attachment_image to return the correct image. Using the hero-image size we defined right at the start.
/**
 * Reusable partials
 */
public static function hero_image_partial()
{
  return wp_get_attachment_image(get_theme_mod('hero_image'), 'hero-image');
}
In the template you don’t really need to know all this, just what the function is doing. So just below the class in customizer.php is a helper function.
/**
 * Friendlier access for template files
 */
function hero_image()
{
  return Hero_Customize::hero_image_partial();
}
Inside your template you check if the image exists, then output it. If there is no image, then make sure the default image does. This is where it will start without any Customizer changes.
// Check if the image really exists
if ( ! empty(hero_image()) && null !== hero_image() )
{
  echo hero_image();
}
// Otherwise start with the default image
else
{
  echo '<img src="' . get_template_directory_uri() . '/images/hero-image.svg' . '">';
}
That’s everything
I hope you have found value in this series and it’s helped you to learn some new things. Again, you’re welcome to download the files from Github.
View on Github