How to: swatches in Illustrator
How to make the most of swatches in Illustrator. Covers cleaning up the defaults, adding your own global swatches, and keeping them in sync across your document.
— views
The swatches feature in Illustrator isn’t something I’ve used often. Partly this has been down to being unsure of the best way, and not trusting that they will remain there. As there are random ones to begin with that, you will never use and the process of deleting them seems annoying each time. In this post, I’ll show you the best way to clean up existing swatches, add your own and keep them updated.
Make a new document
To start you’ll need a new document; the size doesn’t matter too much. As it’s a small part of the overall process, I started with 1280 width and 800 height.
Clear the current swatches
The current swatches are of no use, so to make things tidier delete them.
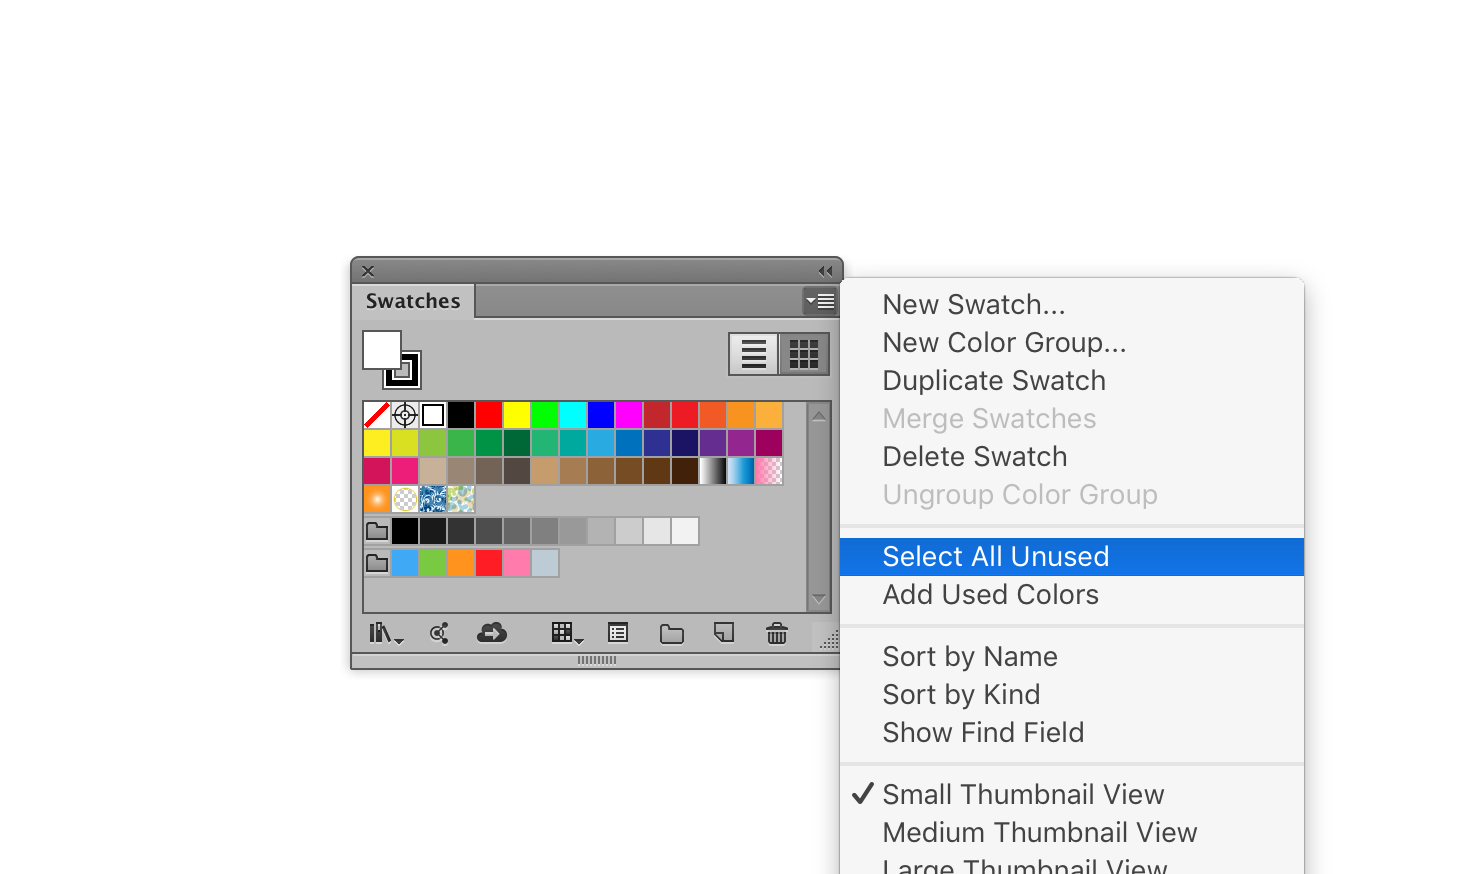
An easy way to do this is by going to Window > Swatches. With the window open, click the top right icon, then select “Select All Unused”. Finally, click the trash icon, which is at the bottom right of the swatches panel.
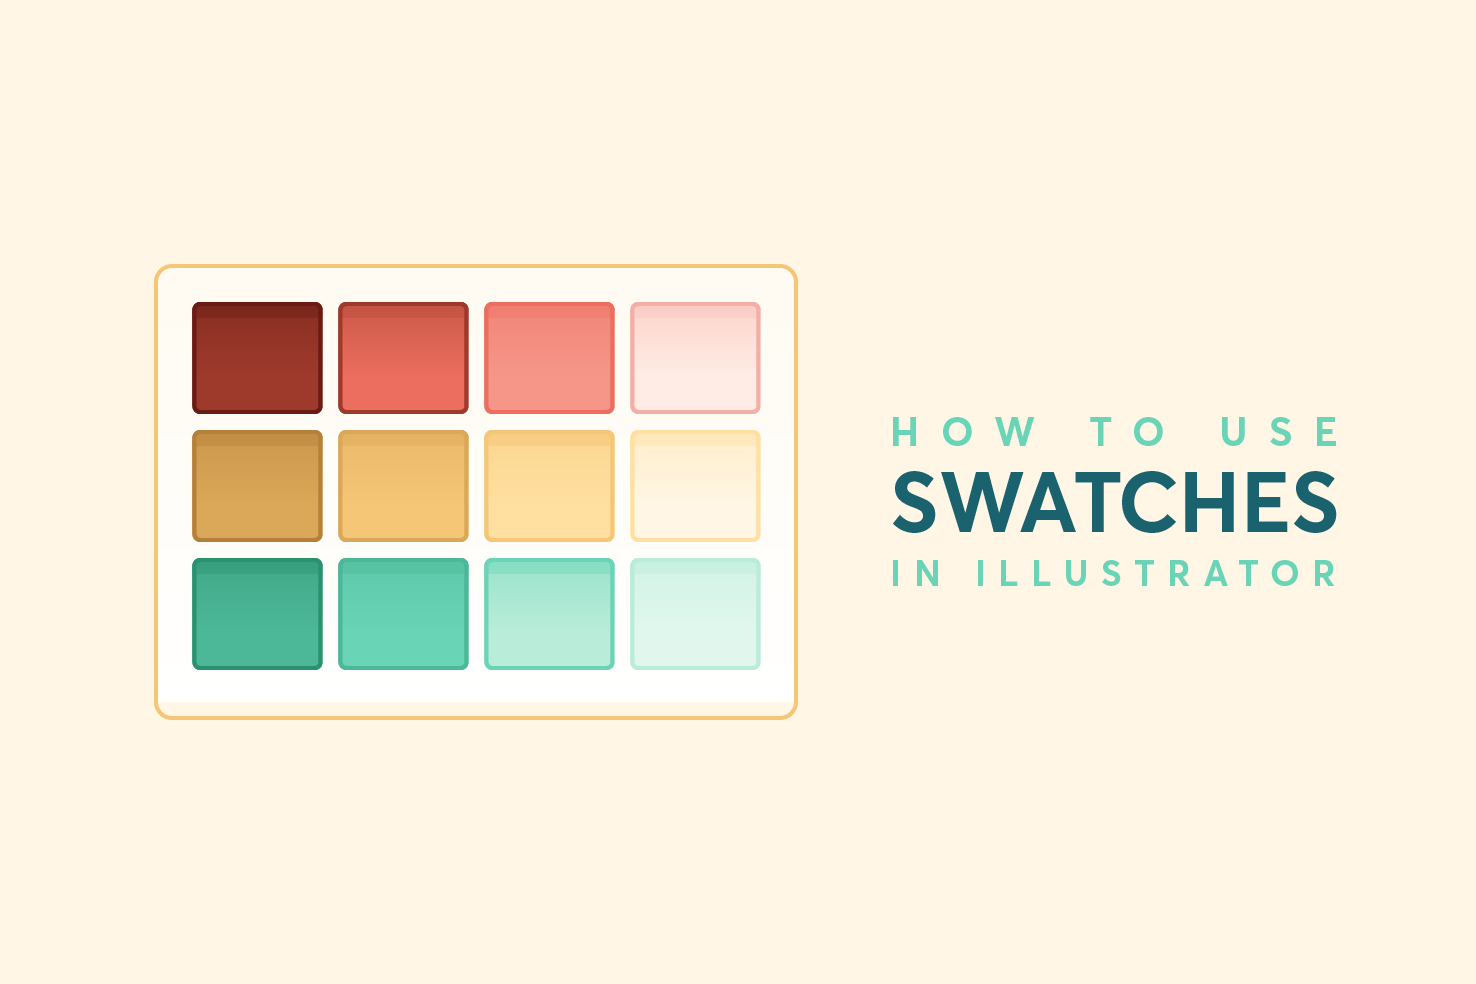
Make a colour palette
Now that the swatch window is empty, it’s up to you to make a colour palette. The best way I find is to draw a set of squares and fill them in. You can make it presentable, as part of a style guide. It doesn’t matter too much, but it may make it feel more permanent.
You can add swatches without the need for doing this. However, it makes the process easier.
Saving colours to the swatch palette
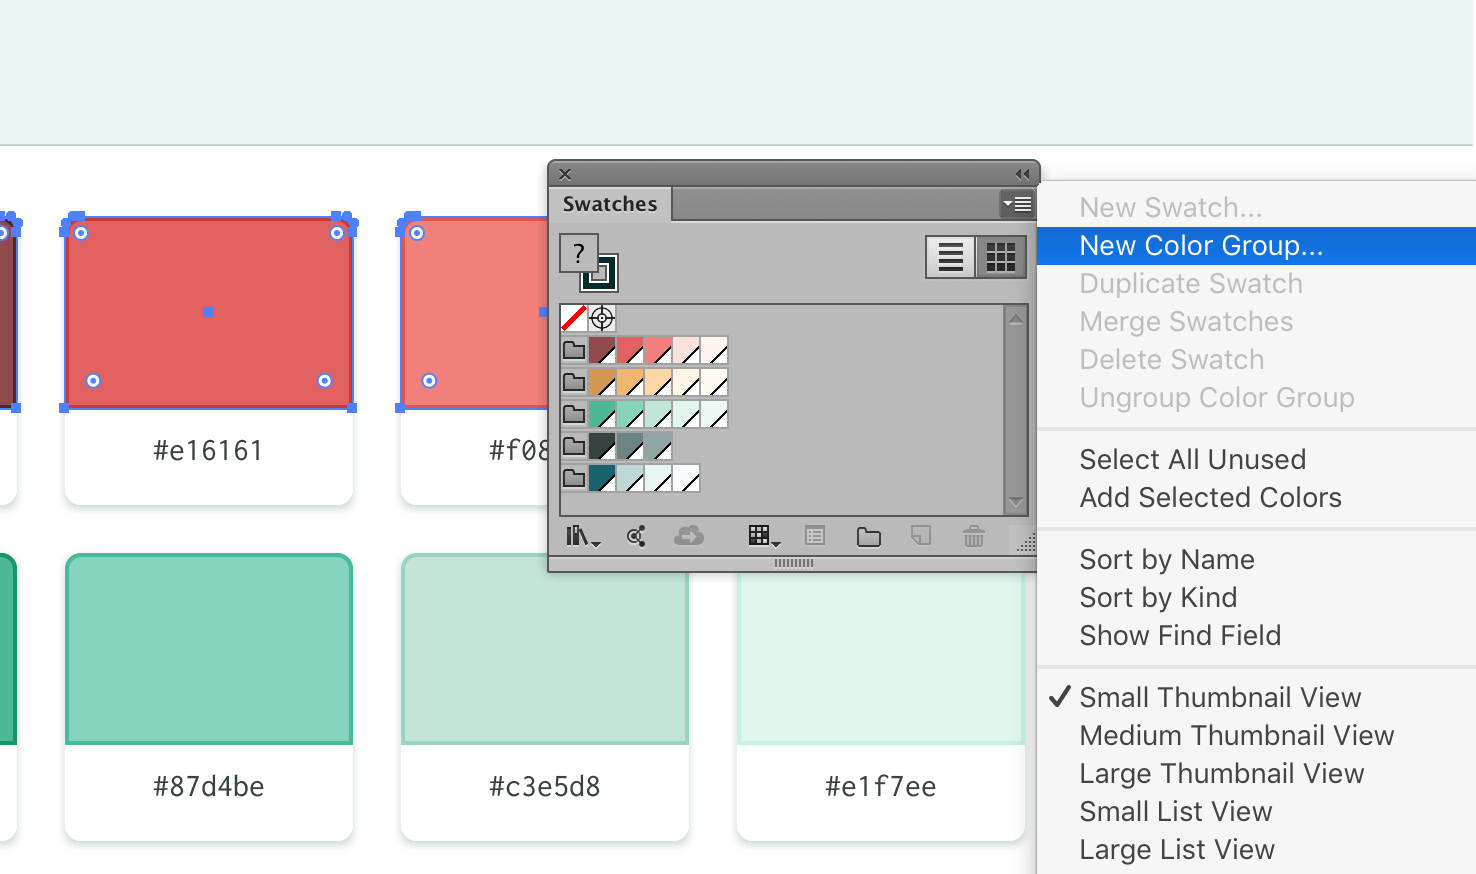
To save colours as swatches, the quickest way is to select them all and in the swatches panel options, choose ‘New Color Group’.
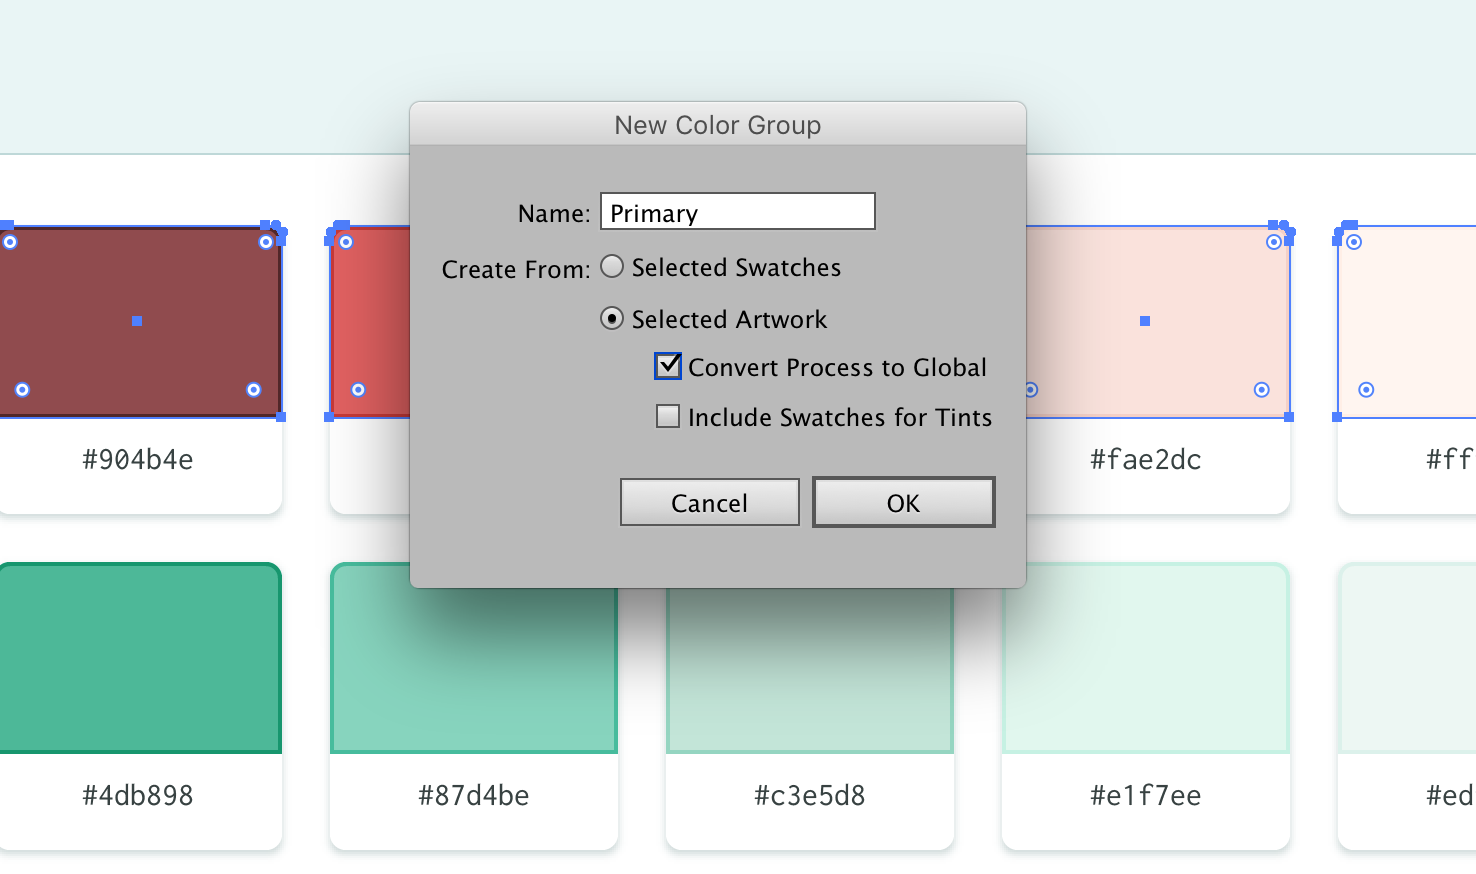
A window will open to name the colour group and the two options of making the colours global and including swatches for tints. I recommend making them global, I will explain why shortly. I named my colour group primary, as I have selected each of the colours that fall under that group. I will repeat this process for each different colour group.
If you haven’t added tints or shades of each colour, it may be useful for you to select the Include Swatches for Tints option. I like to make my tints and shades, rather than have them generated. It can be a quicker process to have them generated.
Global swatches
An important step of using a colour palette is to make the colours global. This means that if you change the colour of the swatch, that will then update everywhere within the document.
This is handy as, if you colour things with the same colour, then need to change it, everything will need changing. Saving you time in the long run.
Save the file
To make sure you can reuse the colour palette, you must save it as a regular illustrator file.
Make a new document and import
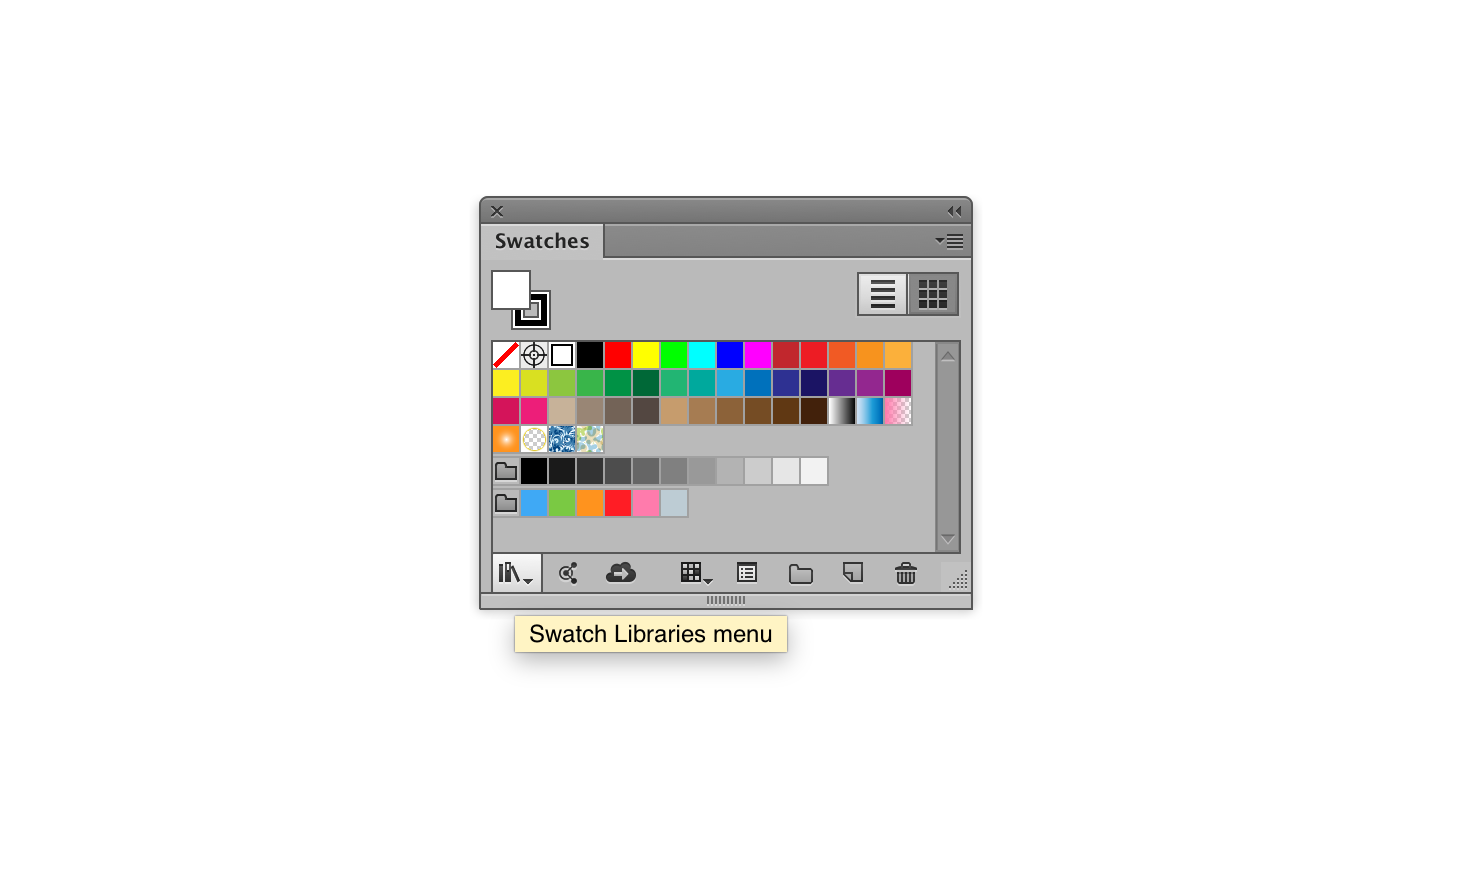
To use the colour palette in future documents, you need to import the palette. In the swatch panel, click the bottom left most icon (Swatch Libraries menu) and choose ‘Other Library’.
Navigate to your saved swatch file, and choose that. It will now open a panel. You’re now able to use the colours within the document as you please.
Downsides
The real downside is I’ve not come across a manageable way to update a palette automatically. You’ll want to be sure the colours are right before starting anything using a colour palette. However, if you do have to make tweaks reimporting then using the options Select > Same offers can speed up the process. However if you’ve got your colour palette determined, it should be an occasional change.
View on Github